Blog

Custom Paint by Numbers Dropshipping: The Ultimate Manufacturer Guide

Direct from the Factory Floor: Discover how modern print-on-demand dropshipping, advanced photo-to-canvas algorithms, vacuum-sealed acrylic paint formulation, and private-label packaging empower craft brands and e-commerce entrepreneurs to deliver museum-quality personalized paint-by-numbers kits worldwide—with zero inventory risk.

Custom paint by numbers dropshipping guide
A premium commercial-grade custom paint-by-numbers kit featuring high-density numbered canvas, 36 vibrant vacuum-sealed acrylic pots, precision nylon brushes, full-color reference guide, and branded packaging.

1. The Evolution of Custom Crafts: Why Paint-by-Numbers Is Dominating Print-on-Demand

The global creative craft sector has experienced an unprecedented renaissance. Crafters worldwide have fallen in love with the therapeutic, mindful satisfaction of hands-on art. While sparkle enthusiasts have long celebrated the tactile joy of mosaic gem placement, personalized painting has surged alongside it as one of the most profitable, highly sought-after custom gifts in the e-commerce space. If you are already familiar with choosing the perfect photo for custom craft kits, you understand the emotional power of converting a cherished memory—a wedding portrait, a beloved pet, or an anniversary snapshot—into a tangible DIY masterpiece.

Traditionally, launching a custom paint-by-numbers product line required prohibitive capital investment: purchasing commercial dye-sublimation or pigment plotters, sourcing chemical-safe acrylic paints, mixing bespoke pantone hues by hand, and managing complex inventory. Today, a modern direct manufacturer dropshipping model flips that paradigm entirely. By partnering directly with a specialized manufacturing facility, e-commerce storefronts, independent artists, and boutique craft brands can offer customized, photo-personalized paint-by-numbers kits with zero physical inventory, seamless print-on-demand fulfillment, and door-to-door global shipping.

Key Takeaway for Sellers: Custom paint-by-numbers kits combine the emotional appeal of personalized gifts with the operational efficiency of automated on-demand fulfillment. Orders are produced individually on demand and dispatched directly to your end customers under your own brand identity.

2. Behind the Canvas: How Digital Photo-to-Canvas Conversion Really Works

The single greatest factor determining customer satisfaction and positive product reviews is the fidelity of the photo-to-painting conversion. Transforming a high-resolution, continuous-tone digital photograph into discrete, numbered color cells requires specialized graphic design software and expert color quantization.

The 4-Stage Factory Conversion Pipeline

  1. Resolution & Aspect Ratio Assessment: When a customer submits a photograph, designers evaluate the pixel density, subject focus, and lighting contrast. Just as in crafting with gems—where canvas detail depends on precise line mapping—the image must maintain clear boundaries without visual artifacting.
  2. Dynamic Range & Contrast Enhancement: Smartphone photos frequently suffer from backlit shadows or harsh highlights. Factory designers calibrate midtone curves, lift dark shadows, and balance skin tones so that facial features do not become muddied once translated into pigment regions.
  3. Vector Edge Outlining & Font Typography: Advanced vector tracing maps the image into clean, organic contoured segments. Each segment is dynamically assigned a high-legibility identification number printed with micro-thin, low-opacity gray lines that disappear effortlessly under a single coat of acrylic paint.
  4. Pigment Gamut Mapping & Dispensing: The digital palette is mapped directly to factory pigment formulation codes. Specialized automated dispensing machines mix and fill exact matching acrylic shades, ensuring that the physical paints in the pots mirror the digital rendering precisely.

3. Color Palette Architecture: 24, 36, 48, or Up to 100 Colors?

Offering the right color depth is essential for balancing painting difficulty with photographic realism. Factory production supports flexible color configurations tailored to your target demographic:

  • 24-Color Palette (Beginner & Graphic Art): Ideal for younger audiences, introductory painters, graphic illustrations, bold pop art, and high-contrast landscapes. The color blocks are larger, providing a breezy, relaxing experience with fewer intricate brush transitions.
  • 36-Color Palette (The Sweet Spot for E-Commerce): The gold standard for commercial custom kits. It offers sufficient tonal variation to capture delicate pet fur textures, subtle sky gradations, and natural foliage without overwhelming the hobbyist with microscopic sections.
  • 48-Color Palette (Photographic Realism & Portraits): Recommended for close-up portraits, intricate floral compositions, multi-person family photos, and scenes with subtle ambient shadows. The additional 12 shades bridge gradient steps across human skin tones and reflective surfaces.
  • High-Complexity Sets (Up to 100 Colors): Engineered for master-tier hobbyists and expansive panoramic murals. This tier handles complex museum reproductions, historical paintings, and ultra-high-definition artwork where every brushstroke mimics original oil canvas textures.

4. Anatomy of a Commercial-Grade Custom Paint-by-Numbers Kit

To establish long-term brand equity and generate recurring sales, the physical components of your custom kits must meet exacting quality standards. Here is what an authentic factory-direct kit includes:

ComponentManufacturing SpecificationCustomer Experience Benefit
Canvas SubstrateHigh-density linen/cotton blend (320–380 gsm), pre-primed with acrylic gessoAbsorbs paint evenly without curling, fraying, or bleed-through; preserves texture
Canvas Line PrintingHigh-resolution micro-line printing with anti-fade, low-contrast numbered cellsClear readability for weary eyes without showing through light-colored paints
Acrylic Paint PotsHigh-viscosity, non-toxic water-based pigments sealed in airtight, vacuum-packed podsRich one-coat opacity, zero clumping, vibrant color retention, and extended shelf life
Precision Brushes3-piece or 4-piece set of high-elasticity nylon brushes with rust-proof aluminum ferrulesClean strokes across varying cell sizes: fine detail liner, medium round, and wide flat shader
Color Reference SheetHigh-fidelity full-color miniature thumbnail print with numbered schematic mapEnables painters to double-check accidentally painted numbers without guesswork
Packaging & ExtrasProtective rigid cardboard cylinder or luxury gift box, thank-you card, hanging hardwareDelivers an immaculate unboxing experience; prevents canvas creasing during transit

5. Canvas Sizing Flexibility: From Classic Formats to Panoramic Murals

Selecting the optimal canvas dimensions directly influences both the finished aesthetic quality and customer satisfaction. In our complete canvas size guide, we emphasize that larger canvases provide dramatically superior spatial resolution. This exact rule holds true for custom paint-by-numbers:

  • Standard E-Commerce Size (40 × 50 cm / 16 × 20 in): The undisputed industry standard. It fits universally accessible, off-the-shelf ready-made picture frames, keeps international shipping dimensions lightweight and compact, and provides ample surface area for 1 to 2 portrait subjects.
  • Compact Formats (20 × 30 cm and 30 × 40 cm): Excellent for simple travel designs, children's projects, or quick weekend crafting sessions.
  • Grand & Panoramic Murals (Up to 120 × 600 cm): Specialized factory weaving and wide-format printing accommodate oversized custom canvases—including sweeping panoramic landscapes, multi-panel triptychs, and expansive architectural murals.

For brands offering framing solutions alongside canvas kits, educating your customers on how to frame and mount finished canvases adds substantial perceived value and unlocks lucrative cross-selling opportunities for DIY stretcher bars and floating frames.

6. The Print-on-Demand Dropshipping Engine: How Direct Fulfillment Operates

The beauty of a modern direct-to-consumer manufacturing partnership lies in its effortless operational flow. Store owners can focus entirely on customer acquisition, community building, and creative marketing while the factory manages production, packaging, and international transit.

The Automated 5-Step Fulfillment Lifecycle

  1. Customer Places Order: Your customer uploads their photo and selects their canvas size and color tier on your Shopify, WooCommerce, or Etsy store.
  2. Digital Processing: The image file is submitted to the factory production portal, where designers generate the vector outlines and prepare pigment dispensing formulas.
  3. Swift Factory Production (2–3 Business Days): The custom canvas is precision-printed, the bespoke paint pots are filled and vacuum-sealed, brushes and reference sheets are inserted, and the kit is assembled.
  4. Direct-to-Consumer Dispatch: The package is labeled with your custom brand shipping label and dispatched directly from the manufacturing hub via premier international air couriers.
  5. End-to-End Tracking: Tracking numbers sync automatically with your e-commerce platform, keeping your customer informed throughout transit.

7. Production Speeds and Global Logistics Timelines

In the print-on-demand arena, speed and delivery transparency make or break customer trust. Reliable manufacturing workflows offer predictable turnaround windows:

  • On-Demand Dropship Production: 2 to 3 business days. Custom single-piece orders submitted with customer photos are converted, printed, packed, and ready for courier pickup in under 72 hours.
  • Bulk & Batch Production: 7 to 15 business days for substantial wholesale inventory orders, seasonal warehouse restocking, or multi-hundred kit production runs.
  • International Courier Transit: Standard door-to-door transit to primary consumer destinations—including the United States, Germany, the United Kingdom, and Western Europe—typically averages 12 to 20 calendar days.
  • Customs & Duties (DDP Fulfillment): Shipments can be arranged under Delivered Duty Paid (DDP) terms, ensuring that import customs clearance and local duties are pre-handled. Your customers never encounter unexpected customs invoices or regional postal delays at their doorstep.

8. The Smart Sourcing Model: Prepaid Volume Credits with Zero Expiration

One of the most persistent bottlenecks for growing e-commerce craft brands is balancing unit economics against cash flow. How do you secure volume manufacturing discounts without warehousing stacks of pre-printed kits that might never sell?

The solution is an innovative Prepaid Committed Volume Credit Model. Here is how this high-efficiency system works:

  • Tiered Volume Savings: Rather than paying one-off retail rates per individual dropship order, you prepay for a tiered production block (such as a 50-kit or 100-kit production allocation). This immediately unlocks deep wholesale tiered manufacturing rates across both 24-color and 36-color specifications.
  • Unique Photos Per Order: You do not need to print identical artwork. Every single kit within your prepaid volume credit is produced on-demand using distinct, individual customer photos uploaded as retail orders roll into your store.
  • Credits Never Expire: Your prepaid production balance carries no expiration date. Whether you exhaust your committed volume within two weeks during peak holiday shopping or spread it smoothly across several months, your capital remains fully protected.
  • Maximum Profit Margins: By locking in manufacturer-direct production rates while charging premium retail prices for bespoke personalized artwork, your e-commerce margins remain resilient against paid advertising costs.

9. Private-Label, White-Label & OEM/ODM Brand Customization

Nothing harms repeat purchases faster than sending your customer a generic, unmarked package that looks like a random factory surplus item. Building a defensible craft brand requires a cohesive unboxing aesthetic. Direct manufacturing partnerships offer extensive private-label and white-label custom branding options:

  • Custom Outer Packaging: Brand your exterior kraft mailing tubes, premium rigid presentation boxes, or magnetic gift cases with your logo, color palette, and bespoke artwork.
  • Branded Canvas Headers: Incorporate your company logo, website URL, and social media hashtags directly onto the canvas border margin or header strip.
  • Personalized Inserts & Thank-You Cards: Include branded instruction brochures, discount bounce-back cards for future purchases, and social media photo-sharing invitations right inside the sealed kit.
  • Custom Paint & Tool Accents: Brand the brush handles, paint pot strip lids, and reference cards to deliver an end-to-end luxury craft experience.

10. Quality Control: Why Ordering a Sample Kit Is Your Most Important First Step

Before launching marketing campaigns or committing to volume production tiers, ordering a complete custom production sample kit is an essential quality assurance milestone. A hands-on physical sample enables you to verify:

  • Line Weight & Number Legibility: Confirm that the printed vector lines are fine and crisp, and that numerical indicators are clearly visible without bleeding through light yellow, white, or pastel paints.
  • Paint Consistency & Pot Airtightness: Test that the acrylics flow smoothly off the brush, offer excellent single-coat coverage, and remain fresh and hydrated inside their vacuum-sealed pods.
  • Canvas Texture & Flatness: Ensure the canvas rolls flat without stubborn wrinkles or deep creases that require intensive ironing before painting.
  • Packaging Transit Durability: Evaluate how well the shipping cylinder or presentation box withstands real-world international postal handling.

11. Master Technical Specifications at a Glance

FeatureStandard Dropship SpecificationCustom / Enterprise Options
Standard Canvas Dimensions40 × 50 cm (16 × 20 in) unframedCustom dimensions up to 120 × 600 cm murals
Canvas MaterialPremium archival linen-cotton blendOptional pre-stretched wooden inner frame bars
Paint ChemistryAirtight, non-toxic water-based acrylicsExtended vacuum packaging for long-term storage
Color Range24 or 36 bespoke mixed colors48 colors up to 100 colors for high complexity
Brush Configuration3-piece multi-purpose precision nylon set4-piece deluxe wooden artist handle brush set
Single Dropship Turnaround2–3 business days productionPriority rush queues available
Batch / Bulk Turnaround7–15 business days productionScheduled rolling batch releases
Global Transit Windows12–20 calendar days door-to-doorDDP international tracked air delivery (US, EU, UK)
Volume Credit ExpirationNo expiration date100% flexible photo submission on demand
Branding CapabilitiesWhite-label / blind dropshippingFull OEM/ODM custom boxes, canvas logos & inserts

12. Frequently Asked Questions (FAQ)

Can I prepay for a volume tier and send different customer photos for each kit?

Yes, absolutely. The committed volume credit model is designed specifically for print-on-demand e-commerce sellers. You can purchase a prepaid allocation to secure discounted volume manufacturing tiers, and then submit unique customer photos and individual shipping addresses one by one as orders are placed on your storefront.

Do prepaid manufacturing credits ever expire?

No. Your prepaid production credits do not expire. You have complete freedom to utilize your credit balance over weeks, months, or across multiple seasonal sales campaigns without forfeiting any unused units.

What are the standard production and shipping lead times for dropshipping?

Single custom dropship orders are typically produced and packaged within 2 to 3 business days from receipt of print-ready photo artwork. International door-to-door delivery to key markets like the United States and Germany averages 12 to 20 calendar days with end-to-end tracking.

What happens if a customer uploads a blurry or poorly lit photo?

Factory graphic designers inspect every submitted photograph before running the conversion pipeline. Minor exposure, contrast, and color balance adjustments are handled automatically. If a photo lacks critical detail or resolution, automated alerts flag the file so you can request an alternate image from your buyer before production begins.

Can I order a single custom sample kit before committing to a larger volume?

Yes. Ordering an individual custom sample kit is strongly encouraged. It allows you to inspect the canvas printing fidelity, paint opacity, brush quality, and packaging durability firsthand before marketing your products to retail customers.

13. Scaling Your Custom Craft Business

The personalized craft market continues to expand as consumers seek meaningful, creative experiences that disconnect them from digital screens. By leveraging an experienced paint-by-numbers manufacturer with specialized photo conversion software, vacuum-sealed acrylic paint lines, and reliable dropshipping logistics, you eliminate overhead and inventory friction. Whether you are expanding an established craft storefront or launching your first personalized gift collection, factory-direct on-demand dropshipping provides the scalability, quality, and peace of mind you need to thrive.

14. Request a Wholesale or Dropship Manufacturing Quote

Partner directly with our specialized paint-by-numbers manufacturing facility. Whether you are seeking sample validation, setting up an automated print-on-demand dropshipping integration, or unlocking tiered production credits for your e-commerce storefront, submit your project details below to receive technical specifications and production timelines.

Direct Manufacturer Sourcing Inquiry

Submit your requirements for custom paint-by-numbers manufacturing, dropshipping, or sample kits.
Direct Production Channel: Inquiries are processed directly by our production and technical design team. We support custom photo conversions, non-expiring committed volume credits, and individual door-to-door dropshipping.

Diamond Art How To: A Beginner’s Step-by-Step Guide

Quick answer: Diamond art is made by placing small, faceted resin drills onto the matching symbols of a sticky, color-coded canvas. Peel back a small area, use the included wax or putty pen to lift drills from the tray, and press each drill flat-side down onto its symbol. Keep the rest of the canvas covered as you work.

Also called diamond painting, this beginner-friendly craft uses a printed chart instead of paint or drawing skills. The canvas already has adhesive, so the wax or putty is for picking up each drill—not for gluing it onto the canvas. This diamond art how-to takes you from opening the kit to checking and displaying your finished piece.

What is diamond art?

A diamond painting canvas is printed with a grid of small symbols. Each symbol matches a color or code on the kit’s key and drill packet. The tiny resin pieces—often called drills—have a flat back and a faceted top: the flat side sticks to the adhesive, while the facets face up and catch the light.

The basic rhythm is simple: uncover a small patch, match a symbol to its drill color, pick up a drill with the pen, and place it. Working in short sections keeps the adhesive clean and makes a large canvas feel manageable.

What you need to start

Most beginner kits contain the essentials. Check your kit’s instructions, since tools and pen styles vary by brand.

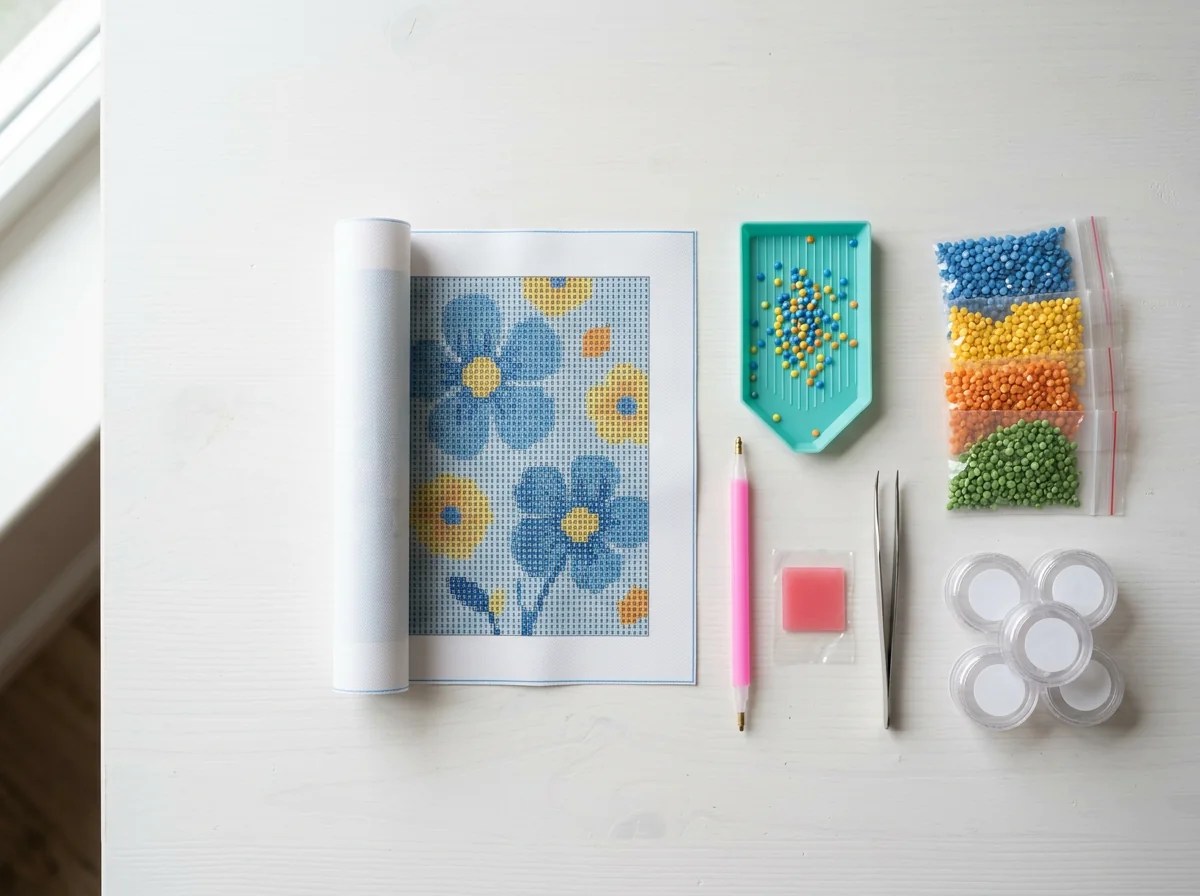
Diamond art supplies arranged on a clean table: adhesive canvas, grooved tray, stylus, wax, drills and tweezers
A basic diamond art kit usually includes a coded canvas, drills, a tray, an applicator and wax or putty.
  • Adhesive canvas and symbol key: the printed pattern and color-code reference.
  • Drills: small resin “diamonds,” usually sorted into labeled packets.
  • Applicator pen: a pen-style tool that picks up one or more drills.
  • Wax or putty: temporary grip for a traditional hollow-tip pen; some newer pens come prefilled.
  • Grooved tray: helps orient drills so they are easier to pick up.
  • Optional helpers: a bright desk lamp or light pad, tweezers, and small labeled containers can make longer projects easier, but they are not required.

Before you begin: set up your workspace

Choose a stable, clean table with enough room for the canvas, tray and the color you are using. Good light makes small symbols easier to distinguish. Wash and dry your hands before touching the canvas, and keep loose drills away from young children and pets because the pieces are small.

If the canvas arrived rolled, lay it flat and give it time to relax. You can place clean, lightweight books along the edges while the protective film stays on. Avoid folding the canvas or applying heat unless the kit maker specifically says it is safe; heat can damage some canvases or adhesives.

Before placing a drill, look at the symbol key and locate the matching packet code. Symbols and color labels can differ between kits, so use the chart that came with your canvas rather than assuming a code means the same thing in every set.

How to do diamond art: 8 beginner steps

1. Choose a small working area

Start at an edge or corner and pick an area you can comfortably reach—roughly palm-sized is a useful first patch. Peel or fold back only enough of the clear protective film to expose that area. Leaving the rest covered helps keep dust, lint and stray fibers off the adhesive. If the film is divided into sections already, lift one section at a time.

2. Match a symbol to its drill color

Look at the symbols in the exposed patch and find one on the chart. Match its symbol or code to the label on the corresponding drill packet. Double-check similar-looking marks—such as a letter and a number—before opening a color. When in doubt, use the code on the kit’s key rather than judging by color alone.

3. Pour a little of one color into the tray

Open only the packet you need and pour a small amount into the grooved tray. A shallow layer is easier to line up than an overfilled tray. Keep the packet or its label nearby, and close or set it aside before opening another color so drills do not get mixed.

4. Gently line up the drills

Tilt the tray slightly and shake it from side to side. The grooves help most drills settle with their flat backs down and faceted tops facing up. If some are upside down, shake again rather than trying to flip every piece by hand. A light touch is enough; vigorous shaking can scatter drills.

5. Prepare the applicator pen

For a traditional hollow-tip pen, press the tip lightly into the supplied wax until it picks up a small amount. You usually do not need to reload after every drill. If your kit has a prefilled putty pen, follow its instructions instead. Test the tip on one drill: it should pick up the piece without needing a hard press.

6. Pick up and place each drill

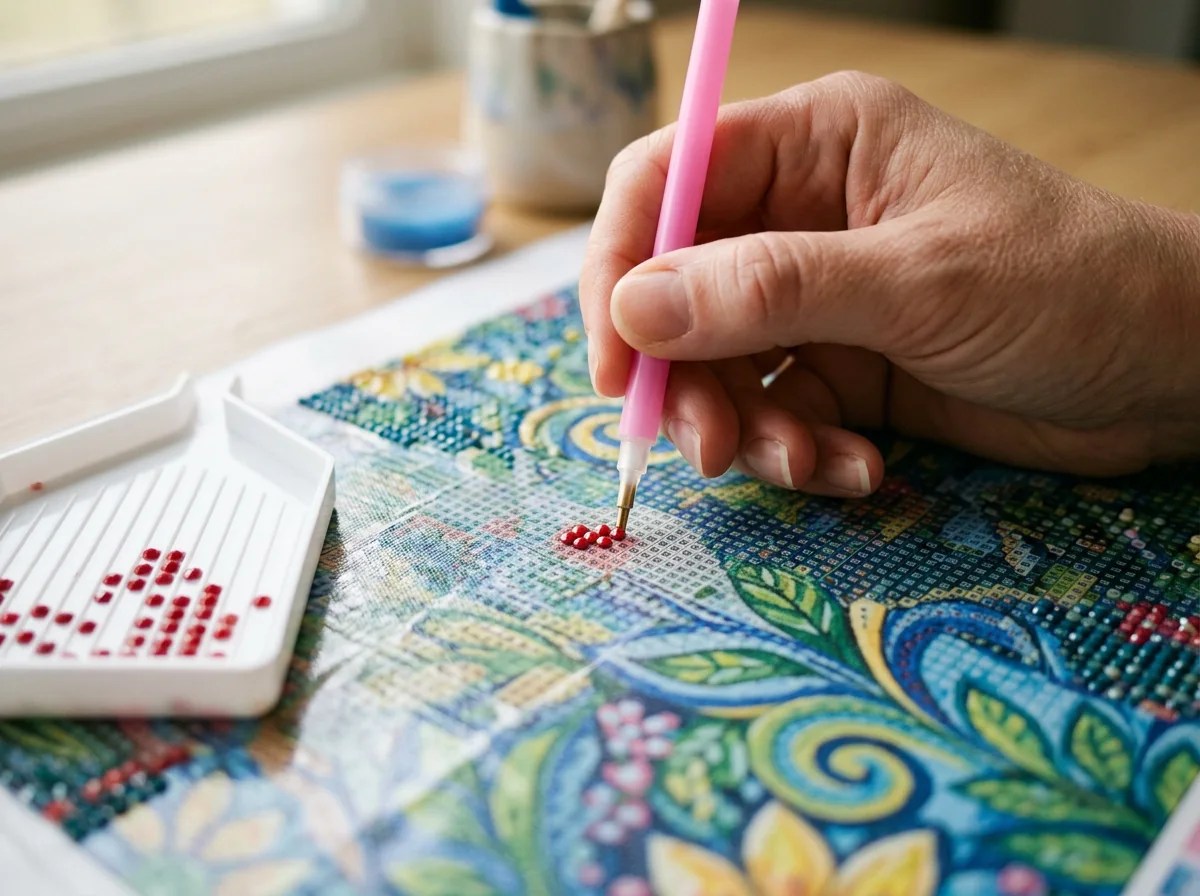
Touch the pen tip to the faceted top of a drill in the tray. Carry it to the canvas, line it up over the matching symbol, and press gently so the flat back contacts the adhesive. Lift the pen straight up. If a drill lands crooked, nudge it into position with tweezers before placing the neighboring drills.

Close-up of a diamond painting stylus placing a resin drill onto its matching spot on an adhesive canvas
Place the flat back on the adhesive and leave the faceted side facing up.

7. Fill the patch, one color at a time

Continue placing that color wherever its symbol appears in the exposed area. Then return the remaining drills to their labeled bag or container, switch colors, and repeat. Many beginners find it easiest to finish one small patch before uncovering the next. A multi-placer pen can speed up long rows of the same color, but a single-tip pen gives more control around detailed sections.

8. Cover the canvas and repeat

When you pause, cover the exposed adhesive with the original protective film or a clean release sheet made for craft work. Continue with the next small patch until the design is complete. At the end, check for missing or misplaced drills and press the finished area evenly through a clean protective layer if your kit instructions recommend it.

Round or square drills: which is easier?

Both shapes work the same way, but they feel a little different to place. If this is your first project and you want a forgiving start, round drills are often easier to align. Square drills can create a tightly tiled look, but straight rows matter more.

Drill shapeWhat to expectBeginner note
RoundIndividual circles with a little visible space between them.Forgiving of slight spacing differences; a comfortable first choice.
SquarePieces sit closer edge to edge for a more tiled surface.Take extra care with alignment, especially across long rows.

Common diamond art problems—and how to fix them

  • The pen will not pick up a drill: refresh the wax or putty a little at a time. If the tip is clogged with old wax, clean it according to the pen’s instructions.
  • A drill will not stick to the canvas: check that the protective film is fully lifted from that spot and that the adhesive is clean. Remove loose lint carefully with tweezers; avoid rubbing the area or using liquid cleaners. If the tack is gone, ask the kit maker about a compatible adhesive.
  • Two colors look almost identical: compare packet codes with the canvas key, not just the shade. Keep each color in its own labeled bag or container.
  • Rows are drifting or uneven: slow down for a few placements and align each drill with its printed cell. Use tweezers to make small corrections before the surrounding drills close in.
  • The canvas keeps curling: let it rest flat under light, clean weights with the protective film still on. Do not crease it or use heat unless the manufacturer recommends that method.
  • The symbols are hard to read: move to brighter, neutral light. A light pad or magnifier is an optional help for low-contrast patterns.

How to finish, seal and display your diamond painting

When every section is filled, compare the canvas with its key and look for bare symbols, upside-down pieces or stray drills. If the kit’s film still fits, lay it over the finished surface and use a clean, smooth roller or brayer with even, gentle pressure. Do not press hard enough to shift the drills or scrape their facets.

Sealing is optional, not a required step for every canvas. A compatible sealer can help secure drills for some display situations, but a thick coat may soften the sparkle or change the finish. If you choose to seal, test the product on a spare drill or inconspicuous edge first, use a product intended for diamond art, and follow its drying instructions. For framing, allow enough space so glass or acrylic does not press directly on the raised drills.

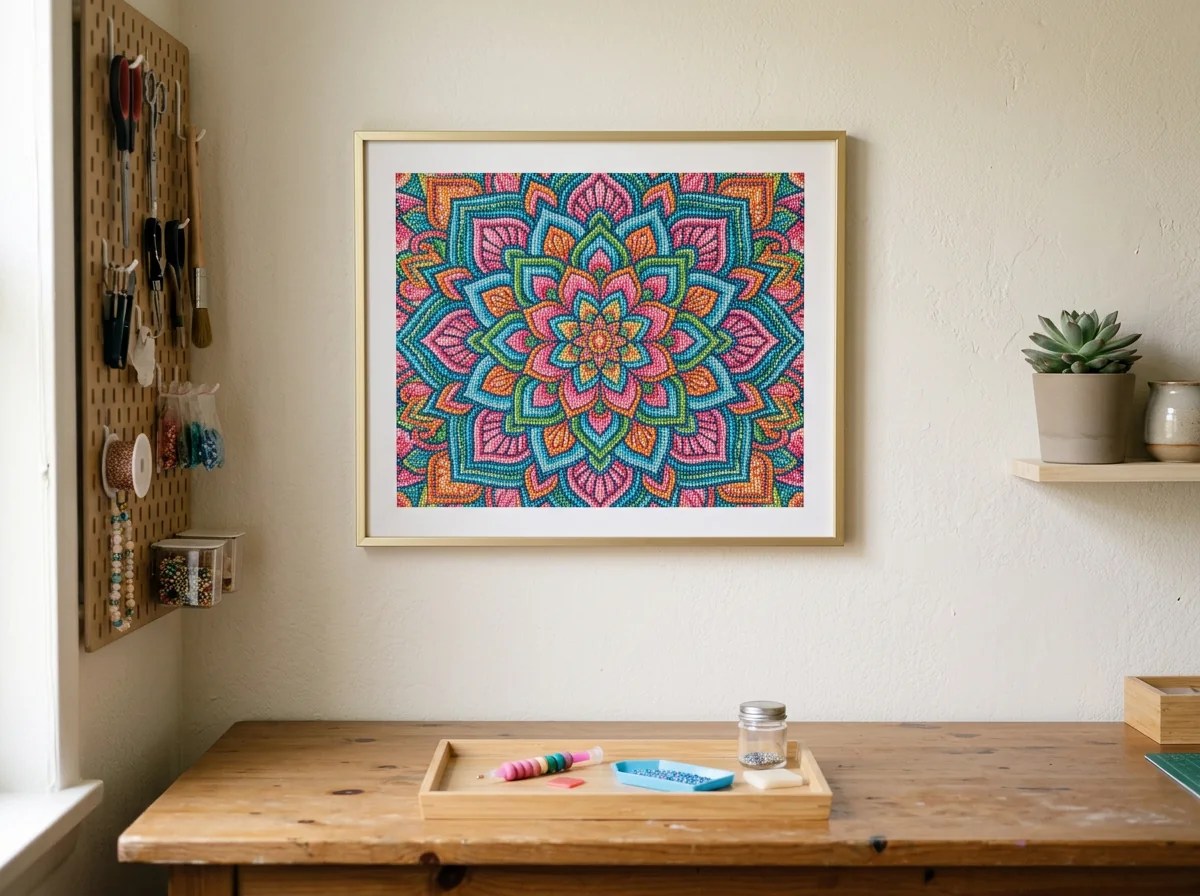
Finished colorful diamond art mandala displayed in a simple frame
A finished diamond painting can be framed or displayed once it is fully dry and protected.

Store leftover drills in clearly marked containers and keep an unfinished canvas covered between sessions. Once the project is dry and secure, display it away from excess moisture and direct sunlight.

Diamond art how-to FAQs

Is diamond art easy for beginners?

Yes. The canvas guides you with a symbol key, and the basic task is to match each symbol to the correct drill. Start with a manageable design, use good light, and work in small sections.

Do I need glue for diamond painting?

Usually not. The canvas is already adhesive. Wax or putty goes on the pen tip to pick up drills; it is not meant to be spread over the canvas. Only add adhesive if your kit maker recommends a specific repair method.

Which side of the diamond goes down?

The flat back goes down onto the sticky canvas. The faceted side faces up so it can catch the light.

Can I remove a drill I placed in the wrong spot?

Often, yes. Lift it carefully with tweezers and reposition it before nearby drills make access difficult. Avoid scraping or pulling hard, which can damage the canvas or disturb its adhesive.

Should I seal my finished diamond art?

Not always. Sealing is a personal choice that depends on the canvas, the display and the sealer. It may improve hold, but some products can reduce the facets’ shine. Test first and follow the product label.

The easiest way to get started is to keep three habits: match the kit’s code, expose only a small area, and keep drills labeled. After a few rows, the process becomes a steady pick-and-place rhythm—and the image appears one sparkling section at a time.

Wholesale Diamond Painting Kits for Your Brand

Diamond Painting Guide works with Joysine, a China-based diamond painting manufacturer, to help retailers and online sellers source custom wholesale kits. Build a kit around your artwork and brand with custom packaging, instruction paper, a thank-you card, tools and wax, plus private-label, white-label, OEM/ODM, wholesale and dropshipping options.

Wholesale program at a glance

  • Manufacturing partner: Joysine, based in China.
  • Products: Custom diamond painting kits for wholesale orders.
  • Customization: Package, instruction paper, thank-you card, tool and wax.
  • Branding and production: Private label, white label, OEM and ODM.
  • Fulfillment options: Wholesale and dropshipping.
  • Design support: Professional designers and free design support.
  • Trade term: FOB Shenzhen is available for bulk orders.
  • Typical production lead time: 7–15 days; shipping transit is additional.

Wholesale diamond painting kits built around your brand

Whether you are adding a new craft range, developing a branded gift, or sourcing kits for an online shop, start with the product you want your customers to open. Joysine’s skilled production workers and professional designers support custom diamond painting kit projects, with free design support available for your brief.

Share your artwork or concept, target customer, preferred kit details and order estimate. The team can then confirm which custom options fit your project, along with the minimum order quantity, unit pricing and schedule. Those details can vary by artwork, packaging and order size, so request them in writing before you commit.

Customize the kit from package to accessories

A custom kit is more than a canvas. Depending on your order requirements, ask Joysine about customizing:

  • The diamond painting kit: Develop a custom kit around your selected artwork or design brief.
  • Package: Create packaging that suits your product presentation and brand.
  • Instruction paper: Prepare custom instructions for your customers and market.
  • Thank-you card: Add a branded insert to the unboxing experience.
  • Tool and wax: Request custom tool and wax options for your kit configuration.

If you are supplying artwork, make sure you have the commercial rights to use it. Before production, confirm the final design scope, wording, packaging details, included components and any applicable minimums with Joysine.

Choose a sourcing model that fits your business

Wholesale and bulk orders

For craft shops, gift retailers, distributors and e-commerce brands, request a quote based on your design mix, quantity, customization and shipping plan. Ask for the MOQ, unit price, packaging costs and shipping charges as separate line items so you can calculate your landed cost.

Private label and white label

Private-label and white-label options let you sell diamond painting kits under your own brand. The available branding may depend on the product and order quantity, so specify where you want your brand to appear—for example, on the package, instruction paper or thank-you card—and ask Joysine to confirm what is possible.

OEM and ODM projects

OEM/ODM services can support projects based on your own specifications or a collaborative product brief. If you need design help, Joysine offers free design support through its professional designers. Agree in writing on the design scope, file requirements, approval process and ownership or permitted use of any original artwork.

Dropshipping

Dropshipping is available for sellers who want to fulfill customer orders without holding every kit in stock. Before you launch, confirm how orders are submitted, which destinations can be served, dispatch timing, tracking, packaging and whether branded inserts are supported for your program.

Production lead time and FOB Shenzhen shipping

Joysine’s stated production lead time is typically 7–15 days. This refers to production, not delivery to your door. Confirm the production start point and order-specific schedule in your quote; freight transit time is additional and depends on the shipping method and destination.

FOB Shenzhen is available for bulk orders. FOB is a sea-freight trade term, so ask the quote to name the exact port or terminal and spell out who arranges the main freight, insurance and import clearance or duties. If you need dropshipping or air/parcel delivery, request the applicable shipping terms separately.

How to request an accurate wholesale quote

To help the team quote the right product, include as many of these details as you can:

  • Your business name, sales channel and destination country.
  • Estimated order quantity and whether you need bulk shipment or dropshipping.
  • Artwork or a short design brief, plus the intended kit specifications.
  • Branding needs: package, instruction paper, thank-you card, tool and wax.
  • Your target production or launch date and preferred shipping term, such as FOB Shenzhen.

Ask the written quote to confirm MOQ, pricing, design-support scope, sample availability and cost (if needed), production timing, packaging details and shipping responsibilities. This makes it easier to compare suppliers and plan your retail price before placing an order.

Wholesale diamond painting kit FAQs

Can I order a custom diamond painting kit with my own artwork?

Yes. Joysine supports custom diamond painting kits and offers free design support. Share your artwork or concept and confirm file requirements, design scope and approval steps before production. You are responsible for ensuring you have permission to use supplied artwork commercially.

What parts of the kit can be customized?

Custom options include the kit, package, instruction paper, thank-you card, tool and wax. Which options are available for a particular order—and any minimums or extra costs—should be confirmed in the quote.

Does Joysine offer private label, white label and OEM/ODM?

Yes. Private-label, white-label, OEM and ODM services are available. Tell Joysine whether you already have a finished design and specification or need design support, then confirm the branding scope and terms in writing.

Is dropshipping available?

Yes, dropshipping is an available fulfillment option. Confirm eligible destinations, order-submission process, shipping charges, dispatch estimates, tracking and packaging details for your sales channel.

How long does production take?

The stated production lead time is typically 7–15 days. Transit time is separate, and the exact production schedule should be confirmed for your order after the specifications are agreed.

What are the minimum order quantity and price?

MOQ and pricing depend on the design, order quantity, packaging and selected custom options. No single MOQ or price applies to every project, so request a written quote for your specific kit.

What does FOB Shenzhen mean?

FOB Shenzhen is a sea-freight trade term for bulk orders. Ask the quote to identify the named port or terminal and confirm freight, insurance and import-clearance responsibilities before you book transport.

Request a wholesale diamond painting quote

Ready to develop a custom kit or discuss a bulk order? Use the inquiry form below to tell us about your product, branding and shipping needs. Diamond Painting Guide will coordinate your inquiry with Joysine and help clarify the next steps.

Submitting this form sends your information through FormSubmit.co to [email protected]. Diamond Painting Guide may share relevant inquiry details with Joysine to prepare a response or quote. Please do not include payment details, passwords or other sensitive information. See our Privacy Policy.

Partner note: This page introduces Diamond Painting Guide’s manufacturing collaboration with Joysine. Confirm product specifications, minimum order quantities, pricing, payment terms and shipping responsibilities in a written quote before placing an order.

Still comparing suppliers? Read our guide to buying diamond painting directly from manufacturers.

Diamond Art Vacuum Pen Guide (2026): How It Works, Pros, Cons & How to Choose

Quick answer: A diamond art vacuum pen is a small electric tool that picks up drills with gentle suction instead of wax. It places drills with a light touch, cuts hand fatigue on long sessions, and works brilliantly on AB and specialty drills. The trade-offs are a little motor noise, tips that eventually wear out, and a price of roughly $10–$50. If you paint more than once a week, it is one of the biggest comfort upgrades you can make.

Every diamond painter knows the ritual: press the pink pen into the wax, hope you got exactly enough, chase the drill that dropped for the third time, re-wax, repeat. A vacuum pen deletes that ritual. You hover, press a button, and the drill sticks to the pen — no wax, no flakes, no smears on your adhesive.

But is a vacuum pen actually worth it, or is it gadget hype? This guide covers how these pens really work, the honest pros and cons, what separates a great one from a frustrating one, and exactly how to use and troubleshoot it. New to the hobby? Start with our plain-English intro to diamond painting first.

What Is a Diamond Art Vacuum Pen?

A diamond art vacuum pen — also sold as an electric diamond painting pen, suction pen, or vacuum applicator — is a pen-shaped tool with a tiny electric motor inside. Instead of using sticky wax to grab each drill (the traditional setting pen method), it uses air suction. Hold the button and the tip gently grips a drill; release the button or touch the drill to the canvas, and the drill lets go right on its symbol.

Most vacuum pens ship as a small kit: the pen body, one or more pickup tips, a USB charging cable, and often a basic sorting tray. Some sets add multi-placer tips, spare filters, or a small desk pump. Because box contents vary wildly between brands, it pays to check exactly what is included before you order — the same rule we give in our guide on what to look for when buying a diamond painting kit.

How a Vacuum Pen Works (in Plain English)

Cordless diamond art vacuum pen with a metal tip beside a tray of teal drills and a diamond painting canvas on a light wood desk

Inside the barrel sits a micro motor (or, on wired models, a small external pump), a rechargeable battery, a tiny filter, and an airway that ends at the tip. The motor pulls air through a hole in the tip no wider than a drill, creating suction of around 37–40 kPa on most current models — plenty to lift a standard resin drill, gentle enough to release it on contact with the canvas.

Three things decide whether a pickup feels magical or maddening:

  1. Suction level. Many pens offer 3–5 speeds. Low is ideal for delicate AB and small round drills; higher settings handle larger or heavier drills.
  2. Tip condition. The tip must seal cleanly against the flat back of the drill. A clogged, worn, or slightly bent tip is the number-one cause of "it stopped picking up."
  3. Technique. Hold the pen straight and center the tip on the drill — attacking at an angle breaks the seal.

Placement is the satisfying part: the canvas adhesive is stickier than the suction, so when you touch the drill to its symbol, the canvas wins the tug-of-war and the drill stays put.

The Two Types of Vacuum Pens

1. Wireless all-in-one pens

Everything — motor, battery, tip — lives in the pen body. No hose, no tether. These are quiet, light (premium aluminium models weigh about 25–30 grams), and perfect for sofa crafting, travel, or stitching along with a movie. Battery life is typically several hours per charge. If you paint on the go, this is your type.

2. Wired pens with a tube and pump

A thin air tube connects the pen to a small electric pump that sits on your desk. You get stronger, perfectly steady suction and unlimited runtime while plugged in — and because the pump has room for a proper filter, the motor tends to live longer. The trade-off: the tube. It is fine at a dedicated craft table, and annoying everywhere else.

Wired diamond painting vacuum pen with air tube connected to a small white desk pump on a craft table with drill trays nearby
FeatureWireless penWired tube + pump
SuctionModerate, adjustableStronger and steadier
NoiseOften very quietPump hum sits nearby
PortabilityExcellentDesk-bound
RuntimeSeveral hours per chargeUnlimited while plugged in
Cable or tubeNoneYes — plan your workspace
Typical price$15–$50$10–$35

Vacuum Pen vs Wax Pen: What Actually Changes

Classic pink wax applicator pen and modern white electric vacuum pen lying side by side on a diamond painting canvas
Vacuum penTraditional wax pen
Pickup methodSuctionSticky wax or putty
Wax refillsNeverEvery 20–60 minutes
Hand pressureA light touchPress and lift every drill
Big single-colour blocksFast, with multi-placersModerate
AB & specialty drillsExcellentOften frustrating
MessNoneWax crumbs and residue
NoiseLight motor humSilent
Up-front cost$10–$50$2–$10
Typical failureClog, flat battery, tip wearWax drying out mid-session

The humble pen that came in your kit still works — here is what to do when your first kit arrives. But wax is a fussy middleman: too much and it smears onto the drill faces, too little and the drill drops on the way to the canvas. If you have ever had to rescue a canvas after a wax accident, you already understand the appeal of removing wax from the equation entirely.

The Real Pros of a Vacuum Pen

1. Zero wax drama

No re-waxing, no wax flakes on your drills, no smudges on the adhesive. The pickup is consistent from the first drill of the session to the last. Painters who switch almost always cite this first.

2. Your hands and wrists will thank you

A wax pen demands a press-lift-move cycle thousands of times per canvas. A vacuum pen replaces that with a button. For anyone with arthritis, RSI, or simply a three-hour session planned, the difference in fatigue is dramatic — and less strain means you can enjoy the stress relief the hobby is known for instead of fighting a sore grip.

3. Real speed where it counts

Pair suction with a multi-placer tip and large single-colour fields disappear quickly. Section your canvas with washi tape sectioning, switch on a podcast, and watch a background melt away. For big custom canvases — see our size guide — those saved minutes add up to saved evenings.

4. It loves AB and specialty drills

Aurora Borealis (AB) coatings, glitter, pearls and odd-shaped specialty drills are exactly where wax struggles — the coatings resist sticky wax and drop rates climb. Suction grips them by geometry rather than stickiness, so they behave like any other drill. If your kits are heavy on special drills, a vacuum pen stops being a luxury and becomes the right tool.

5. A cleaner canvas and tidier drills

Nothing smears onto faces of the drills or into the gaps between them. Finished pieces need less touch-up before framing — and if you display your work, our preservation guide will keep it sparkling for years.

6. An easier on-ramp for kids and beginners

The "hover and click" action is more intuitive than wax pressure control. Supervised kids around seven and up generally take to it quickly — and beginners skip the most common early frustration in the hobby.

The Honest Cons (No Sugar-Coating)

  • There is a hum. Even quiet wireless pens make a soft motor sound; wired pumps sit on the desk and purr along with you. If you need silence to craft beside a sleeping baby, a classic pen is still king.
  • Tips wear out. Plastic and PPS tips degrade over weeks or months of use — some last 50–100 hours, some less. Worn tips lose their seal and drop drills. The single smartest buying rule: choose a pen with replaceable tips.
  • Suction needs tuning. Too strong and the pen grabs two drills at once; too weak and it drops them mid-transfer. Pens with 3–5 levels make this easy — fixed-suction pens can frustrate.
  • Clogs happen. A tiny dust ball or wax crumb in the tip can ruin pickup. (More on the two-minute fix below.)
  • Multi-placer support varies. Some pens are strictly single-placers; others accept 2-, 3-, or 6-placer tips. If speed matters to you, check before buying.
  • Not a nudger. Straightening rows of square drills is still tweezers' work. Keep a pair handy — many painters run vacuum pen and tweezers side by side.
  • One more thing to charge. Wireless pens die mid-canvas if you forget. USB-C models at least share a cable with your phone.
Macro close-up of a vacuum pen tip holding a pink resin drill above a white tray of aligned sparkling drills

Who Should Buy a Vacuum Pen — and Who Can Skip It

Buy one if you:

  • paint weekly or tackle canvases bigger than 40 × 50 cm
  • have arthritis, hand fatigue, or reduced grip strength
  • love AB, glitter or specialty drills
  • have fought (and lost) the battle with wax consistency
  • craft in shared spaces and want tidy, quiet-ish tools — especially alongside the vision-friendly setups in our tips for tired eyes

Feel free to skip it if you:

  • only paint occasional small kits — a $3 pen and good wax genuinely suffice
  • need absolute silence while crafting
  • are a square-drill perfectionist who lives for tweezer work
  • are outfitting a whole class or group on a tight budget

What to Look For When Buying: a 7-Point Checklist

  1. Replaceable tips. The deal-breaker. Screw-in or push-in replacement tips cost a few dollars; a pen with a moulded, non-replaceable tip has a built-in expiry date.
  2. Adjustable suction. Three levels is a sensible minimum; five gives fine control for mixed drill types.
  3. Noise. "Whisper quiet" claims are relative — read user reviews for real-world noise notes.
  4. Weight and grip. Around 25–30 g feels like a marker, not a tool. Rubberised or ergonomic barrels help on long sessions.
  5. Battery and charging. Look for several hours of runtime and USB-C. Some wired units run indefinitely from a power bank.
  6. Tip ecosystem. Does the brand sell multi-placers, metal tips, or filter spares? A pen with accessories grows with you.
  7. Price sanity. Budget pens ($10–18) are perfect for trying the concept. The mid range ($18–30) is the value sweet spot. Premium models ($30–50) buy quieter motors, metal tips and better kits.

For the rest of your setup, our roundup of the top tools every diamond painter needs covers trays, storage and lighting that pair perfectly with a vacuum pen.

How to Use a Vacuum Pen (Step by Step)

  1. Charge it fully before first use, and top up between sessions.
  2. Fit the tip. Push or screw on a clean single-placer tip until it seats firmly.
  3. Start on low suction. You can always go up a level; you cannot un-pick two drills at once.
  4. Load your tray. Pour a small amount of drills, give the tray a gentle shake so drills settle face-up in the grooves.
  5. Pick up. Hold the pen vertical, center the tip on a drill, press the button. Lift — the drill comes with you.
  6. Place. Move straight to the matching symbol and touch the drill down. The adhesive takes it from the pen.
  7. Repeat and rotate. If pickup feels weak, check the tip before you blame the motor (see below).
  8. Big blocks? Attach a multi-placer if your pen supports one, load several drills at once, and press them down in one steady motion.

Pro tip: if a drill lands crooked, do not force it with the pen. Straighten it with tweezers, or nudge gently with the tip while the suction is off — pressing hard is how tips bend and die early.

Troubleshooting & Maintenance: The Two-Minute Fixes

Most "my vacuum pen stopped working" stories end the same way: a tiny dust ball in the tip. One Reddit crafter found their pen taking multiple tries per pickup — the fix was poking a dust bunny out of the tip with tweezers, after which they finished four sections "in record time." Before you return a pen, run this table:

ProblemLikely causeFix
Won't pick up at allClogged tip, low battery, or suction too lowClear the tip hole with tweezers, wipe with a damp cloth, charge, bump suction one level
Grabs two or three drillsSuction too strongDrop a suction level; pick drills from the tray's flat side
Drops drills mid-transferWorn or bent tip, moving too fastSlow down; replace the tip
Suction fading over weeksFilter clog or tip wearClean or replace the filter; fit a fresh tip
Suddenly louderDebris in the airwayBlow out the airway; check the filter seat
Won't chargeCable or portTry another cable; inspect the port for lint

Care routine: wipe the tip after every session (30 seconds), check the filter monthly on wired models, store the pen with a tip cover in a dry place, and keep spare tips in your drill storage system so a worn tip never ends a painting night early. And if a project goes sideways for any reason, our big problems-and-solutions guide has your back.

Where to Buy & What to Spend

Amazon carries the widest range of vacuum pens, from $10 no-name models to $50 premium kits with metal tips and lights; craft retailers and specialist diamond painting shops stock the mid range; direct-from-China marketplaces undercut everyone if you will wait for shipping. Wherever you buy, prioritise a replaceable-tip design over a rock-bottom price. Our guide to the best places to buy diamond painting kits applies the same seller checklist — verified reviews, clear specs, realistic photos — that keeps tool shopping safe.

FAQ: Diamond Art Vacuum Pens

Is a vacuum pen worth it for diamond painting?

Yes — if you paint regularly. A vacuum pen removes wax refills, reduces hand fatigue, speeds up large colour blocks, and places AB and specialty drills reliably. It costs $10–$50 once, versus endless wax fiddling. Occasional painters on small kits can stay happy with a classic wax pen.

Can you use a vacuum pen on square drills?

Yes, vacuum pens pick up and place square drills fine — the suction grips the flat back of the drill. Keep tweezers nearby for straightening rows and corners, since square drills demand tighter alignment than round ones and the pen is a placer, not a nudger.

Do vacuum pens work on AB and specialty drills?

They work especially well. Specialty coatings (AB, glitter, pearls) often resist wax, causing drops — vacuum pens grip by shape instead of stickiness, so coated and odd-shaped drills behave like ordinary ones. Use a lower suction level for delicate or flat-backed specialty pieces.

How long do vacuum pen tips last?

Plastic and PPS tips typically last 50–100 hours of painting before the opening wears or the seal degrades; metal push-in tips last far longer. Replace the tip as soon as pickup gets inconsistent — spares cost only a few dollars and restore like-new suction.

Are vacuum pens loud?

Wireless pens are usually quiet enough to sit under music, TV or conversation — most owners stop noticing the hum. Wired pump models make more noise because the pump sits on the desk. If you are noise-sensitive, choose a wireless pen marketed and reviewed as quiet.

Do I still need a regular pen if I own a vacuum pen?

Keep one. A standard wax pen with a multi-placer is still handy for tiny gaps, and tweezers remain essential for straightening square drills and handling mistakes. Most experienced painters end up with a small toolkit rather than one do-it-all device — see more clever diamond painting tricks and five things most painters do not know for what that toolkit can look like.

Final Thoughts

A diamond art vacuum pen will not magically finish your canvas — but it will quietly remove the hobby's most repetitive chore. No wax. No residue. No sore hand at 10 p.m. Choose a model with replaceable tips and adjustable suction, learn the straight-down pickup, and check the tip before you blame the motor. Do that, and the only thing left to worry about is which kit to start next.

Happy sparkling — and may your suction always hold. ✨

Buy Diamond Painting Directly from Manufacturer: 16 China Wholesale Factories Compared (2026)

Buy diamond painting directly from manufacturer: compare 16 China wholesale factories with MOQs from 1 kit, OEM/private label and worldwide shipping.

Quick answer

If you want to buy diamond painting directly from manufacturer, China is where the global supply is made. This guide compares 16 wholesale diamond painting factories — concentrated in Shenzhen (Guangdong) and Zhejiang province — with minimum orders starting at 1 kit, factory-direct pricing up to 70% off retail, full OEM/ODM private-label services, and delivery to the US, EU, UK, Canada, Australia and beyond.

Table of contents

  1. What is diamond painting — and why do retailers stock it?
  2. Why buy diamond painting directly from a manufacturer?
  3. Why source diamond painting from China?
  4. How to choose a diamond painting manufacturer
  5. Wholesale comparison table
  6. The 16 manufacturers, reviewed
  7. What does wholesale diamond painting cost?
  8. Shipping, Incoterms and lead times
  9. Red flags: how to spot a fake "factory"
  10. FAQ
  11. Conclusion

What is diamond painting — and why do retailers stock it?

Diamond painting (also called 5D diamond art or diamond dotz) merges paint-by-numbers with mosaic art: crafters place tiny faceted resin "drills" onto a color-coded adhesive canvas to create a sparkling, frame-worthy picture. For retailers, the category is attractive because it offers high margins, low return rates and year-round demand, with peaks around Q4 gifting, Mother's Day and school holidays. Kits sell as impulse buys at small sizes and as premium gifts at large sizes, which makes them ideal for craft stores, gift shops, Amazon/Etsy/Shopify sellers, subscription boxes and corporate gifting.

One manufacturer in this list sizes the global diamond art painting market at US$163.11 million in 2025, projected to reach US$248.41 million by 2033 (a 5.5% CAGR) — steady growth that keeps wholesale catalogs expanding.

Why buy diamond painting directly from a manufacturer?

Buying through a trading company or marketplace middleman adds a markup of roughly 10–30% and inserts an extra layer between you and the production line. When you buy diamond painting directly from a manufacturer, you get:

  • Factory-direct pricing. Published wholesale tiers in this guide run from 25% to 70% off retail, which is where reseller margins of 50–85% come from.
  • Quality control at the source. You can specify canvas adhesive quality (poured glue vs. tape), drill counts with surplus allowances, print resolution (300+ DPI charts) and packaging durability — and approve samples before bulk production.
  • OEM/ODM and private label. Your logo on the box, canvas, drills, pens, wax and instruction sheets — every one of the 16 suppliers below offers some form of branding.
  • Low minimum order quantities. The barrier to entry has collapsed: several factories now accept 1-kit sample orders and 20–50-unit wholesale MOQs.
  • One partner for everything. Kits, custom packaging, tools, light pads, frames and loose drills can often be consolidated into a single purchase order and shipment.
  • Dropshipping options. Many factories will pick, pack and ship single orders directly to your customers under your brand — no inventory required.

Why source diamond painting from China?

China dominates global diamond painting production, and the reason is structural rather than accidental:

  • Manufacturing clusters. The industry is concentrated in Yiwu and Dongyang (Zhejiang province) — the world's small-commodity and craft hubs — and in Shenzhen (Guangdong), which combines manufacturing with electronics-grade supply chains for tools and accessories.
  • Complete in-house supply chains. Leading factories control canvas printing, adhesive coating, laser cutting, drill production, sorting and packing under one roof, which keeps unit costs low and quality consistent across large runs.
  • Export logistics. Multiple export gateways (FOB Shenzhen, Shanghai, Ningbo, Yiwu) feed express lanes (5–9 days worldwide), e-commerce parcel lines (7–12 days), and sea freight (25–35 days), plus DDP door-to-door delivery to the US, EU, UK, Canada and Australia with duties prepaid.
  • Compliance-ready. Established exporters certify kits to CE, EN71-3, ASTM, CPSIA, REACH and RoHS standards, which matters if you sell into the EU, US or Australian markets.
  • English-speaking B2B teams. Every supplier in this list staffs an English-speaking sales desk, most answering quote requests within 6–24 hours.

How to choose a diamond painting manufacturer

Before you send a deposit, run every supplier through this checklist:

  1. MOQ and mix rules. Confirm the minimum per design and whether mixed designs count toward it.
  2. Sampling policy. A real factory will produce a pre-production sample — ideally with the sample cost credited against your first bulk order.
  3. Incoterms. Know whether you are quoted EXW, FOB, CIF or DDP, and ask for a landed-cost quote (unit price + freight + duty) so customs never surprises you.
  4. QC process and certifications. Ask for the inspection checkpoints (print, glue, cut, packing, drill weight checks) and request certificates (CE, EN71, ASTM, CPSIA, REACH, RoHS).
  5. Lead times. Separate stock-kit lead times from custom/OEM lead times — they can differ by two weeks.
  6. Payment terms. Standard is 30% deposit / 70% before dispatch; established buyers can negotiate Net-30 or T/T.
  7. IP protection. If you send original artwork, ask for an NDA or written confidentiality commitment before sharing files.

Wholesale comparison table

# Manufacturer Base Published MOQ Standout feature
1 Paint With Diamond China (FOB Shanghai) 1 kit Lowest MOQ + blind dropshipping
2 Diamond Painting Australia China (FOB Shanghai) 1 kit Australia-focused private label & Australiana art
3 DIPTG Shenzhen, Guangdong 20 units US/EU warehouse stock for 2–5 day restock
4 EaseResin China production center 20 pcs/design Transparent published pricing + free marketing assets
5 ResinDiamond China $300 (~15–20 kits) 19,535+ designs, lifetime warranty
6 PaintbyDot US / EU / China warehouses 50 units + $500 min value 3–15 day worldwide delivery, 20,000+ designs
7 DrillPainting China (est. 2021) 50 kits Tiered discounts to 25%+, free replacements
8 ProDiamondPainting Shenzhen, Guangdong 50 kits (10/design) Digital-proof approval before anything is printed
9 ResinHeal China (FOB Shenzhen) 50 kits Artwork-specific round vs. square charting
10 Crystal Art Painting China manufacturing hub 50 units Kits + full accessories line in one PO
11 Good Diamond Painting China (2,000 m² factory) Flexible Full OEM/ODM, ASTM & EN71 certified
12 DotzPainting China Low, flexible Custom kits + packaging + tools under one roof
13 TinyResin Shenzhen, Guangdong 100 custom / 20 stock 4-point QC, NDA/IP protection
14 ShinyResin China (4,000+ m²) Quote-based One PO covers kits, tools and accessories
15 ColorResin Zhejiang 100 stock / 500 OEM Machine-controlled consistency at scale
16 ResinPainting China (3,000+ m²) Flexible Scales from 50 to 50,000 kits

The 16 manufacturers, reviewed

Group A — Lowest MOQs: start with 1–50 kits

1. Paint With Diamond — lowest entry point, dropship-ready

Paint With Diamond is a direct factory shipping FOB Shanghai/Ningbo with the lowest published MOQ in this list: from 1 kit for sampling and print-on-demand dropshipping. Production runs in 7–15 days on high-speed digital printing and automated drill packing. Kits use 26-facet resin drills (round, square and AB), 300+ DPI DMC charting on wrinkle-free velvet canvas, in sizes from 20×20 cm to 120×180 cm. The company advertises 60–85% retail margins, with volume tiers reaching 50%+ off at 1,000+ kits. Materials comply with CE, EN71-3, CPSIA, REACH and RoHS. Blind dropshipping is available for Shopify, Etsy, Amazon and TikTok Shop, with DDP door-to-door freight to the US, EU, UK, CA and AU. Quotes are returned within 6 hours. Best for: e-commerce brands and dropshippers that want to validate a design with a single kit.

2. Diamond Painting Australia — factory-direct, built for the AU market

Diamond Painting Australia manufactures in-house and ships FOB Shanghai, purpose-built for Australian retailers, Amazon AU sellers, gift wholesalers and online studios. MOQ is from 1 kit, lead times are 7–15 days, and the program covers private label, white label, OEM/ODM, carton wholesale and dropshipping. The catalog specializes in Australiana artwork — native wildlife, outback scenes, reef and city skylines — with EN-AU instruction sheets and AU small-parts safety notes. Incoterms include FOB Shanghai, EXW, CIF Australia and DDP Australia, with lanes to Melbourne, Sydney, Brisbane and Auckland; the same factory run also supplies NZ, US, UK, Canada and EU distributors. Best for: Australian and New Zealand retailers and marketplace sellers.

3. DIPTG — 20-unit MOQ with US/EU local stock

DIPTG is a manufacturer and exporter in Shenzhen, Guangdong, quoting a 20-unit MOQ with mix-and-match across the catalog. The range covers 5D full- and partial-drill kits, custom photo kits, diamond art on plywood, and tools/accessories, in sizes from 20×20 cm to 100×80 cm plus custom dimensions. Published discount tiers run 25% off retail at 20–99 units, 35% at 100–499, and 45%+ at 500+. Samples ship in 3–5 business days and are credited against the first bulk order. Logistics are a highlight: worldwide express in 5–9 days, sea freight in 25–35 days, or 2–5 day delivery from US/EU warehouse stock. Quotes are available EXW, FOB Shenzhen, CIF or DDP, with duty and VAT estimates included. Best for: craft retailers, Amazon/Etsy/eBay/TikTok Shop sellers, museum gift shops and subscription boxes.

4. EaseResin — transparent pricing and retailer support

EaseResin is a diamond painting brand with a production center in China, aimed at SMB retailers rather than container-scale buyers. MOQ is 20 pcs per design with mixed sizes; samples of 1–5 kits are sold at wholesale price. Kits use HD poured-glue canvas, 26-facet 5D drills with 20–30% extra included, and a DMC 447-color system, with peak capacity of 8,000–10,000 kits/day. Pricing is unusually transparent for a 30×40 cm full-drill kit: $9.80 (1–19 pcs), $6.50–$7.20 (20–49), $5.40–$6.20 (50–199) and from $4.90 (200+) — roughly 40–60% off its $18.85–$69.85 retail range. Custom photo kits start at 20 pcs, private label includes custom boxes and canvas branding, and blind dropship is available. Partners get a CSV product feed, Shopify/Amazon/Etsy-ready copy, free design mockups at 50+ pcs and Net-30 terms. Production takes 5–10 business days; delivery is 10–20 days to the US. Best for: small and mid-size retailers that want curation and marketing assets, not just cartons.

5. ResinDiamond — $300 to start, lifetime warranty

ResinDiamond manufactures 5D kits in China with a $300 minimum order — roughly 15–20 kits, no contract. Discounts of 25% / 35% / 45% off retail apply automatically at $300 / $1,500 / $5,000 order values across a live catalog of 19,535+ designs in 45 collections, with new arrivals weekly. Dropshipping carries no MOQ: single units ship under your brand with tracking. Orders dispatch from the China facility within 24–72 hours via DHL/FedEx/UPS, or by sea for pallet volumes. Every kit carries a lifetime warranty — missing drills, tools or a damaged canvas are replaced free, forever. First orders include 3/10/25 free sample kits, and approved partners receive a CSV stock feed plus photo and video assets. White-label packaging is available from the Retailer tier; payment via PayPal, card or T/T. Best for: online sellers who want minimal risk and a massive ready-made catalog.

6. PaintbyDot — US/EU/China warehouses, 3–15 day delivery

PaintbyDot runs a wholesale program oriented to the US and worldwide, fulfilling from warehouses in the United States, Europe and China with 3–15 day delivery. The catalog holds 20,000+ designs; the MOQ is 50 units per design with a $500 minimum order value. Published tiers by size include 30×30 cm at $8.99→$6.99 and 40×50 cm at $14.99→$10.99 as volume scales — up to about 70% off retail. Private-label packaging, custom sizes, exclusive designs and custom photo kits (+$2/unit) are available, along with blind dropshipping. Samples cost $5 and are credited toward the first order; wholesale orders over $2,000 ship free. Payment by PayPal, wire or card. Best for: US craft stores, gift shops and resellers who prioritize fast domestic delivery.

7. DrillPainting — 50-kit MOQ, tiered discounts to 25%+

DrillPainting has produced premium 5D kits since 2021, with a 50-kit MOQ and mixed-design ordering so you can test bestsellers in one shipment. Discounts tier from 10% off at 50–99 kits to 25%+ at 500+ kits. Quotes return within 24–48 hours, and every parcel is tracked worldwide (3–7 business days domestic, 10–21 days international). Custom kits can be built from customer photos, artwork or licensed designs, with full private/white-label branding, in sizes from 5"×5" to 20"×30" plus multi-panel sets. Damaged or missing components are replaced free of charge, and unopened kits can be returned within 30 days. Best for: boutiques and resellers validating an assortment before scaling.

8. ProDiamondPainting — digital proof before printing

ProDiamondPainting sells factory-direct from its own production line in Shenzhen, with an MOQ of 50 kits mixed across designs (10 per design) and custom packaging from 100 kits. Its standout process control: every custom design is charted and approved as a digital rendering before anything is printed, with revisions welcome until final sign-off; physical samples are optional. Kits use round or square resin drills, and the tool set (pen, tray, wax) can be customized or omitted to hit a price point. Lead time is 7–15 days, terms FOB Shenzhen with DDP quotations on request, and dropshipping is supported. Best for: brands that want tight control over kit configuration and proofing.

9. ResinHeal — artwork-specific charting

ResinHeal is a direct manufacturer (FOB Shenzhen) with an MOQ of 50 kits, combinable across round- and square-drill formats. Its differentiator is artwork-specific charting: round- and square-drill versions of the same image are rendered and reviewed separately, with the color count set by artwork complexity rather than a fixed cap. Reference pricing for a 60×60 cm kit runs $8.50 at 50 units down to $6.30 at 500. A $40 two-piece prototype set (one round-drill and one square-drill 60×60 cm sample) lets you compare formats before committing. Samples take 3–5 working days; bulk production 7–15. AB, fairy-dust and metallic accent drills are available, custom packaging starts at 100 pcs, and the company gives a written guarantee that submitted artwork is used only for quotation and sampling. DDP quotes are available for bulk orders. Best for: detail-oriented brands that want per-artwork chart optimization.

10. Crystal Art Painting — kits plus a full accessories line

Crystal Art Painting supplies bulk 5D kits from China's manufacturing hub, with an MOQ of 50 units (mixed designs allowed) and trade tiers at 50 / 250 / 500 / 1,000+ units. The range spans full- and partial-drill kits, round and square drills, special-shape and AB/crystal-rhinestone kits, in sizes from 20×20 cm to 60×80 cm plus multi-panel formats — plus a deep accessories line (multi-placer pens, LED light pads, tweezers, sealant, frames, loose DMC-matched drills) that consolidates into one shipment and one customs entry. Custom/OEM starts at 100 units per design with the design fee waived at that level. Samples arrive in 5–7 days and are credited against bulk orders; stock kits ship in 3–7 days, custom runs in 12–20 days. Express air takes 5–8 days; sea freight and DDP are available. Custom production runs 30% deposit / 70% before dispatch. Best for: retailers, subscription boxes and corporate gifting programs that want kits and accessories from a single PO.

Group B — Full OEM/ODM and private-label powerhouses

11. Good Diamond Painting — 2,000 m² full-service factory

Good Diamond Painting operates a 2,000 m² factory in China with 40+ designers, machine operators and QC specialists. It sells ready-to-sell wholesale kits (hundreds of designs; full/partial drill; round/square) and full OEM/ODM: custom canvas art from your photos, private-label packaging, custom drill trays and tools, and branded cartons. Materials meet ASTM and EN71 and are non-toxic and eco-friendly. Stock designs dispatch in 3–7 days, custom OEM in 15–25 days, and express shipping worldwide takes 5–8 days. The company ships to North America, Europe and Australia with a dedicated English-speaking account manager from sampling to delivery, and MOQs are flexible. Best for: established retailers and brands wanting a full-service factory partner.

12. DotzPainting — custom kits, packaging and tools under one roof

DotzPainting is a factory-direct supplier of custom diamond painting kits, custom packaging and custom tools. Upload artwork and receive production-ready kits in any size, shape and difficulty — round, square, special-shaped (AB/aurora) drills, partial or full coverage — with precise color matching. Private- and white-label programs extend to branded pens, trays, wax pads and storage containers, plus custom boxes, printed canvas rolls and multi-language instruction sheets. Production takes 7–15 days after sample approval, with worldwide express or sea freight and quotes within 24 hours ([email protected]). Best for: brands that want the tools and packaging branded as carefully as the kits.

13. TinyResin — 4-point QC and IP protection

TinyResin is an OEM/ODM factory in Shenzhen with MOQs of 100 pcs for custom kits and 20 pcs for in-stock designs — and no minimum for dropshipping (single orders ship in 24–48 hours). Sizes run from 15×20 cm to 90×180 cm and larger; drills include round, square, 3D, AB and luminous options. Every batch passes a four-point QC (raw materials, printing, assembly, pre-shipment) and buyers receive pre-shipment photos. Samples take 5–7 days; bulk production 10–20 days. Custom packaging and tools start at 500 pcs. Shipping is worldwide by express, air or sea, including DDP door-to-door to the US, EU, UK and Australia, with NDA/confidentiality protection for your artwork. Payment by T/T or PayPal. Best for: brands scaling custom ranges that need formal IP safeguards.

14. ShinyResin — 4,000+ m², one PO for everything

ShinyResin is a China-based kit factory with a facility of over 4,000 m² (listed in Shenyang) covering laser cutting, adhesive coating, drill supply, kit assembly and packaging in-house. It produces ready-to-sell 5D wholesale kits (full/partial drill, round/square, complete tool packs), custom private-label kits with your logo, barcode and multilingual inserts, OEM/ODM development, and standalone tools and accessories (pens, wax, trays, tweezers, extra drills, storage, frames) for refill SKUs and gift-with-purchase programs. Kits ship worldwide. Contact: [email protected] or WhatsApp +86 156 3112 3898. Best for: wholesalers, retail chains and Amazon/TikTok Shop brands that want canvas, drills and tools on a single purchase order.

15. ColorResin — Zhejiang factory, machine-controlled consistency

ColorResin manufactures in Zhejiang, China, in a 3,000+ m² factory that keeps printing, glue coating, laser cutting, drill packing and assembly under one roof. The range covers 5D kits (round, square, AB and special-shaped drills; full/partial coverage), custom photo diamond paintings and accessories, in sizes 20×20–50×70 cm plus custom dimensions, on standard, poured-glue or stretched canvas. MOQs are 100 pcs per design for stock (mixed orders accepted) and 500 units for custom OEM private label. Terms are FOB Ningbo/Shanghai/Yiwu with express, air or sea freight. Custom orders include a digital proof and physical sample before mass production, and quotes return within 24 hours. Best for: buyers who want machine-controlled consistency across very large runs.

16. ResinPainting — scales from 50 kits to 50,000

ResinPainting is a professional China manufacturer with a 3,000+ m² factory and a complete, science-based quality-management system. Services span wholesale/bulk from 50 kits up to 50,000, custom orders, private label, white label, OEM and ODM. In-house laser cutting, adhesive coating, high-resolution printing and automated packaging lines keep unit 1 and unit 10,000 identical — critical when supplying multiple retail accounts. Every kit ships with the complete accessory set: canvas, sorted drills, pen, wax, tray, tweezers, storage bags and instructions. Worldwide shipping and dropshipping are supported. Best for: distributors that want one scalable partner from test order to container volume.

What does wholesale diamond painting cost?

Published factory-direct pricing varies by canvas size, drill coverage and packaging, but as a working range for full-drill 5D kits:

Kit size Typical wholesale range Typical retail range
20×20 cm (mini) $3.49–$4.50 $9.99
30×30 cm (small) $6.99–$8.99 $19.99
30×40 cm (small-medium) $4.90–$7.20 $18.85–$29.90
40×50 cm (medium) $6.99–$14.99 $29.99
60×80 cm (large) $18.99–$24.99 $49.99
80×100 cm (XL) $29.99–$39.99 $79.99

Large-format custom work prices higher: ResinHeal references $6.30–$8.50 per 60×60 cm kit at 50–500 units. As a rule of thumb, expect 40–70% off retail at wholesale tiers, which supports reseller margins of 50%+ after freight and duty. Always ask for a DDP landed-cost quote so the number you compare is the number you pay at your door.

Shipping, Incoterms and lead times

  • EXW — you arrange everything from the factory gate; cheapest, most work.
  • FOB Shenzhen / Shanghai / Ningbo / Yiwu — the factory loads the container; you arrange ocean freight and import. The most common term in this list.
  • CIF — factory pays freight to your destination port; you handle insurance and import.
  • DDP — door-to-door with duties and VAT prepaid; available from DIPTG, Paint With Diamond, ProDiamondPainting, TinyResin, Crystal Art Painting, ResinHeal, EaseResin and Diamond Painting Australia (Australia lanes).
  • Lead times. Stock kits: 3–7 days production + 5–9 days express worldwide. Custom/OEM: 7–25 days depending on complexity. Sea freight: 25–35 days. Local stock: DIPTG and PaintbyDot hold US/EU inventory for 2–5 day delivery.

Red flags: how to spot a fake "factory"

  • No sample policy, or samples priced absurdly high with no credit against bulk orders.
  • Prices far below the ranges above — genuine resin drills and poured-glue canvas have a floor cost.
  • No certifications (CE, EN71, ASTM, CPSIA, REACH, RoHS) and no willingness to share test reports.
  • No video call or factory tour — a real manufacturer will walk the production line on camera.
  • Vague MOQ answers ("depends") and no written contract, proforma invoice or payment protection (e.g., PayPal goods-and-services, T/T with a deposit structure).

FAQ

What is the lowest MOQ to buy diamond painting directly from a manufacturer?
The lowest published MOQs in this list are 1 kit — Paint With Diamond and Diamond Painting Australia both accept single-kit sample/dropship orders. DIPTG and EaseResin start at 20 units, ResinDiamond at a $300 order value (~15–20 kits), and most others at 50 kits/units.

How much cheaper is it to buy diamond painting factory-direct?
Published wholesale tiers run 25–70% off retail, and several factories advertise reseller margins of 50–85% after shipping and duty. Your real saving depends on order size, canvas size and whether you compare FOB or DDP landed cost.

Do these manufacturers offer OEM and private label?
Yes — all 16 offer OEM/ODM and/or private-label or white-label programs. Custom packaging MOQs typically start at 100–500 pieces per design.

Can I order samples before committing to bulk?
Yes. Every supplier in this guide offers pre-production samples, and many (DIPTG, Crystal Art Painting, PaintbyDot) credit the sample cost against your first bulk order.

How long does production and shipping take?
Stock kits: 3–7 days production plus 5–9 days worldwide express. Custom/OEM: 7–25 days. Sea freight: 25–35 days. US/EU warehouse stock (DIPTG, PaintbyDot): 2–5 days.

Which countries do these factories ship to?
All 16 ship worldwide. DDP door-to-door delivery is available to the US, EU, UK, Canada and Australia; Diamond Painting Australia additionally specializes in AU/NZ lanes with DDP Australia.

What certifications should I ask for?
For Western markets, ask for CE, EN71-3, ASTM, CPSIA, REACH and RoHS documentation, and confirm drills are non-toxic resin.

Conclusion

If you want to buy diamond painting directly from manufacturer, the Chinese wholesale market offers more choice — and lower entry barriers — than ever: MOQs from a single kit, published factory-direct pricing, full private-label branding and DDP delivery to most major markets. Start by shortlisting two or three suppliers that match your channel (retail, e-commerce, dropshipping or distribution), request samples from each, and compare landed cost, not just unit price. The 16 factories above are a vetted starting point for building a diamond painting range on factory-direct margins.


Factory details reflect each supplier's public wholesale pages as of October 2026. MOQs, prices, lead times and terms change frequently — always confirm current figures in writing before placing an order.

How to Use Diamond Painting Tape: A Beginner’s Guide

Quick answer: To use diamond painting tape, apply low-tack washi tape to the sticky margin outside the printed design. To mark work sections, put tape on top of the protective film, not directly on the uncovered symbols. Keep unused areas covered, test the tape first, and peel it off slowly when you finish.

If your wrist keeps catching on a sticky canvas edge, a little tape can make your next painting session less frustrating. It can also help you see where one work section ends and the next begins.

The trick is knowing which surface to tape. This guide covers washi tape for borders and sectioning, plus the difference between washi tape and double-sided adhesive used for repairs.

Jump to: Canvas edges · Sectioning · Removal · Troubleshooting · FAQs

What is diamond painting tape used for?

Washi tape is a lightweight paper craft tape, typically designed to be easy to reposition. Diamond painters use it to cover excess adhesive around a canvas, mark working sections, and label drill containers. However, not every roll has the same adhesive strength, so easy removal should never be taken for granted.

Think of your project as three separate surfaces:

SurfaceWhere the tape belongsWhat to avoid
Sticky margin outside the pictureLow-tack tape over the excess border glue, after testingCovering the outermost drill positions or the color key
Protective film over the pictureGuide strips on the upward-facing side of the filmConfusing the cover with the adhesive underneath
Uncovered symbol gridNo washi tape here; this adhesive needs to hold drillsTaping across symbols or completed diamonds

Remember: border tape touches the spare margin; sectioning tape touches the cover.

Choose your tape and gather a few supplies

Start with a smooth, low-tack washi tape that is wide enough to cover your canvas’s sticky border without hiding the design. A roll around 15 mm wide is a practical starting point, not a requirement. Narrower tape can make less bulky section markers on the film.

You will also need:

  • Your canvas with its original protective cover still in place.
  • Scissors for cutting tape away from the canvas.
  • A ruler, if you want evenly sized sections.
  • Optional diamond-painting release paper for covering unfinished areas.

Low-tack does not mean risk-free. Test a small piece on an inconspicuous margin before taping all four sides. Check for lifted printing, disturbed adhesive, paper fibers, or residue. A quick test cannot guarantee the same result after weeks, so also check any removal guidance on the tape packaging.

Starting a new project? Our new diamond painting kit checklist covers the checks to make before placing your first drill.

How to use diamond painting tape on canvas edges

1. Find the actual edge of the picture

Lay your canvas flat on a clean surface. Identify the outermost row of symbols and look for glue extending beyond it. That excess sticky margin—not the symbol row—is what you want to cover.

If there is no exposed border glue, you can skip border taping.

2. Expose only the margin you need

Leave the main design covered. Lift the protective film just enough to reach one sticky border at a time. Avoid resting your fingers or sleeves on the uncovered adhesive.

3. Align the tape outside the last row of symbols

Cut or tear a manageable strip away from the canvas. Position its inner edge just outside the printed drill area, then lower it onto the spare margin.

Look closely at the first and last symbols along that edge. Both should remain completely visible, with enough space for their drills. Keep the color legend and any useful labels readable, too.

4. Smooth lightly and finish the corners

Press the tape down gently rather than rubbing it hard into the canvas. At each corner, overlap the strips only enough to close the gap. Repeat on the remaining sticky edges.

Do a final check: no symbols hidden, no loose tape sticking into the work area, and no uncovered border glue catching your hand.

How to section a diamond painting with washi tape

For sectioning, apply the tape to the top of the protective film. The tape provides visible boundaries; the film underneath protects the adhesive. Working through the cover in sections is also recommended in Diamond Painting Shoppe’s beginner instructions.

  1. Mark the top of the cover. Add a small tape tab to the outward-facing side before lifting anything. This helps you put the original cover back the same way round.
  2. Choose a manageable section. Try a square around 5 × 5 cm or 10 × 10 cm—roughly 2 × 2 or 4 × 4 inches. These are suggested starting sizes, not rules. Use smaller sections when there are lots of color changes.
  3. Add guide strips to the film. Mark just the next row of sections if you do not want to grid the whole canvas. You can adjust the size as you learn your pace.
  4. Open a section from an outer edge. Fold the cover back where practical. If you need to trim it, lift the film clear of the canvas first and use scissors with both blades away from the canvas. Never cut an interior square by pressing a blade through the cover onto the canvas.
  5. Place the drills in the exposed section. Leave neighboring areas covered instead of peeling everything back to make room.
  6. Re-cover unfinished work. If you stop before completing the section, replace the original film with the same side against the adhesive, or use compatible diamond-painting release paper.

No-cut alternative: Use pre-cut release-paper squares intended for diamond painting. Replace a small area of the original cover at a time, overlapping the squares slightly so no adhesive is left exposed. Lift one square when you are ready to work. Release paper has a non-stick surface designed to protect the canvas adhesive.

Do not substitute ordinary printer paper, tissues, or wax paper. Choose purpose-made release paper and follow its instructions about which side contacts the canvas.

How to remove diamond painting tape

For tape attached to the canvas border:

  1. Hold the canvas flat near the strip you are removing.
  2. Lift a corner and peel slowly, folding the tape back over itself rather than pulling straight upward.
  3. Pause if the canvas, printed surface, or adhesive begins to lift. Do not tug harder.

A slow, low-angle peel is the approach described in Heartful Diamonds’ washi-tape guide. Your own canvas and tape still need a gentle touch. 6

Tape on a removable film section can usually stay attached to that section. You do not need to strip it off over the exposed canvas.

If tape leaves residue, avoid experimenting with alcohol, acetone, oils, or household adhesive removers on the picture. Ask the kit maker for a compatible cleanup method, especially if the residue reaches the drill area.

Common tape problems and what to do

ProblemFirst thing to try
Tape covers the first row of symbolsStop and gently reposition it outside the drill area. Do not place diamonds on the tape.
Sectioning tape curls off the filmTry a fresh strip on the clean, dry top of the cover, or switch to release-paper sections. Do not solve it by taping the exposed picture.
The outermost drills press against the tapeCheck whether the tape overlaps their positions. Move it outward before continuing.
Tape pulls at the canvas or glueStop peeling and ask the kit maker for advice. Avoid force or unapproved solvents.
You cannot finish an opened sectionRe-cover it with the original film or suitable release paper before putting the project away.

The goal is a cleaner workspace, not a perfectly measured grid. If sectioning tape adds more work than it saves, keep it for the borders and fold back the original cover instead.

What if you mean double-sided diamond painting tape?

Double-sided adhesive is a different product from washi tape. Some diamond-painting canvases use a double-sided adhesive sheet to hold drills; others use poured glue. Border tape does not replace either adhesive.

If you bought tape specifically for repairing a non-sticky patch:

  • Check that it is intended for diamond-painting canvas and compatible with your kit’s adhesive.
  • Follow its instructions for preparing the area, positioning the adhesive, and removing the release liner. Keep the printed symbols visible.
  • Avoid foam mounting tape and thick household double-sided tape, which can raise the repaired area above neighboring drills.
  • If a new canvas has a large faulty area, contact the seller before attempting a repair.

Do not cover a damaged canvas with washi tape and try to place diamonds on top. For other project issues, see our diamond painting problems and solutions guide.

Frequently asked questions

Do you need washi tape for diamond painting?

No. It is an optional accessory. You can work successfully by keeping unused areas under the original cover or suitable release paper. Tape is most useful when excess border glue catches your hand or when clear section boundaries help you stay organized.

Can you use painter’s tape or masking tape instead?

A delicate-surface, low-tack painter’s tape may be an alternative for the spare border, but test it first and follow its surface and removal-time guidance. Ordinary masking tape varies in strength. Avoid duct tape and packing tape on the canvas, and do not assume any tape is safe simply because it peels easily from a desk.

Is washi tape the same as release paper?

No. Washi tape has adhesive and is used for borders, labels, or guides on the cover. Release paper has a non-stick surface and covers the sticky picture itself. They serve different jobs and can be used together.

Does this method work with round and square drills?

Yes. The placement rule is the same: keep border tape outside the drill positions and sectioning tape on the protective cover. See our guide to round and square diamond-painting drills if you are still getting familiar with the different kit types.

Can you leave washi tape on a finished diamond painting?

You can choose to keep it as a decorative border, but removable craft tape should not be treated as permanent framing material. For a temporary working border, remove it gently when the project is complete, following the tape maker’s guidance. Tape does not seal or secure the finished diamonds.

The simple rule to remember

Tape the spare border, mark the protective cover, and leave the symbol grid for diamonds. Start with one tested strip and a small work section. You do not need a complicated setup—just enough protection to keep your canvas clean while you enjoy the next few rows.

Sources and further reading

  • Washi tape uses and removal: Heartful Diamonds. 6
  • Working through the protective cover in sections: Diamond Painting Shoppe. 9
  • Release paper and canvas protection: Diamond Art Club. 4
  • Poured glue versus double-sided canvas adhesive: Diamond Art Club. 2

Custom Diamond Painting Size & Drill Guide (2026)

Last updated: October 8, 2026 | Reading time: 9 minutes
Written by the Diamond Painting Guide team — crafters who've finished 30+ custom kits from family photos, pets, and wedding shots.

Quick answer: For custom diamond painting, bigger canvas = sharper photo. Each drill is about 2.5–2.8mm, like one big pixel. Choose at least 40×50cm for one face, 50×70cm or larger for two people or a pet, and 60×80cm+ for groups. Pick square drills for crisp detail, round drills for faster, more relaxing sparkle.

If your custom diamond painting arrived looking blurry, blocky, or nothing like your dog — size was almost certainly too small. Not your photo. Not your skills.

This guide shows you exactly what size to order and whether to choose square or round drills, with drill-count charts, time estimates, and combo recommendations for 6 common photo types. No guesswork.

In this guide:

  1. Why Size and Drill Shape Matter More Than Megapixels
  2. How Canvas Size Controls Detail (With Real Numbers)
  3. Minimum vs. Ideal Sizes by Photo Type
  4. How Long Will It Actually Take?
  5. Square vs Round Drills: An Honest Comparison
  6. Best Size + Drill Combos for Your Photo
  7. 5 Photo Tips That Save Any Custom Kit
  8. What Makes a Quality Custom Kit?
  9. 60-Second Decision Checklist
  10. FAQ

1. Why Size and Drill Shape Matter More Than Megapixels

Think of diamond painting as a mosaic, not printing. Every resin drill is one chunky pixel, about 2.7mm wide.

A phone photo might have 12 million pixels. That same image turned into a 30×40cm canvas? Only about 13,000 drills. You're compressing millions of details into thousands of dots. Something has to give — usually eyes, smiles, and fur texture.

Bottom line: When detail disappears, 80% of the time the cause is:

  1. Canvas too small for the number of faces/details
  2. Wrong drill finish for the subject (soft glow vs. crisp edge)
  3. Busy background competing with the main subject

Go from 30×40cm to 60×80cm and you don't get a little more detail — you get roughly 4x more drills. That's the difference between a fuzzy thumbnail and a clear portrait you actually want to frame.

New to the hobby? Start with What Is Diamond Painting? then come back here before you order custom.

Small vs large custom diamond painting comparison showing blurry small canvas versus sharp large canvas
Small canvases simplify faces into blocks. Larger canvases keep eyes, smiles, and fur recognizable.

2. How Canvas Size Controls Detail (With Real Numbers)

More centimeters = more drills = more information from your photo survives.

How many drills are in common sizes?

Because drills are a fixed size, we can estimate total drill count pretty accurately. Use this to compare:

Canvas Size (design area) Approx. Drills Detail Level Good For
30×40 cm 12,000 – 15,000 Low Simple florals, single object, practice
40×50 cm 20,000 – 28,000 Medium One portrait, one pet close-up
50×70 cm 35,000 – 48,000 High Couples, detailed pets, architecture
60×80 cm 55,000 – 70,000 Very High Families, weddings, landscapes
70×90 cm+ 80,000+ Maximum Groups of 4+, wall art
Counts vary slightly by manufacturer because border vs. design area is measured differently. Always check if the size listed is canvas size or design size.

DIY math if you need it:
Width (cm) ÷ 0.28 × Height (cm) ÷ 0.28 = approx. drills
Example: 50 ÷ 0.28 (178) × 70 ÷ 0.28 (250) = ~44,500 drills

The Face-Height Rule (Don't Skip This)

For any photo with people or pets, use this pro check:

Each face should be at least 6–8 cm tall on the final canvas. Smaller than that, and eyes and mouths melt into 3–4 drills.

How to check: Measure the face height in your photo as a % of the total image height, then multiply by canvas height.

Example: Your daughter's face is 20% of the photo height. On a 40×50cm canvas (50cm tall), her face will be 10cm tall — perfect. On that same photo with three kids side-by-side, each face might be only 4cm tall — too small. Size up to 60×80cm.

If you're on the edge, always go one size up. No one ever regrets ordering bigger for a portrait.

Hand measuring face size on custom diamond painting canvas to check 6-8cm clarity rule
Quick check: if faces will be smaller than 6cm tall on canvas, choose a larger size.

3. Minimum vs. Ideal Sizes by Photo Type

Minimum = it will be recognizable. Ideal = it will look like them and you'll want to frame it.

Your Photo Don't Go Below We Recommend Why
Single portrait (head & shoulders) 40×50 cm 50×70 cm Skin gradients need room to blend
Couple / two people 50×70 cm 60×80 cm Two sets of eyes need double the drills
Family / group (3+ people) 60×80 cm 70×90 cm or larger Small background faces blur first
Pet with dark or white fur 40×50 cm 50×70 cm Fur texture disappears on small grids
Buildings, streets, sharp lines 50×70 cm 60×80 cm Straight edges wobble when compressed
Flowers, abstract, landscape 30×40 cm 40×50 – 50×70 cm Soft shapes forgive smaller sizes

Choosing a photo too? Read this first: How To Choose The Absolute Perfect Photo for Custom Diamond Paintings

4. How Long Will It Actually Take? Be Honest With Yourself

Large canvases look amazing — and they take weekends, not evenings.

From our own timing (and reader polls):

  • Single placer: ~1,000 drills = 25–35 minutes
  • Multi-placer (3–6 drills at once): ~1,000 drills = 12–18 minutes
  • Square drills: add 20–30% more time than round (you'll straighten rows)
Canvas Total Drills Relaxed Pace (1hr/day, single) Speedy Pace (multi-placer)
30×40 cm ~13,000 7–10 days 3–5 days
40×50 cm ~24,000 2–3 weeks 1–2 weeks
50×70 cm ~44,000 4–6 weeks 2–3 weeks
60×80 cm ~62,000 6–9 weeks 3–5 weeks

Our advice: If this is your first custom, don't start with 60×80cm unless you love long projects. A 40×50cm or 50×70cm single portrait is the sweet spot — detailed enough to thrill you, small enough to actually finish.

Cozy craft workspace with large custom diamond painting in progress tray and applicator pen
A 50×70cm custom is a 20–30 hour project. Break it into 1-hour sections and enjoy the process.

5. Square vs Round Drills: An Honest Comparison

Both are 5D resin drills in most modern kits. The difference isn't quality — it's finish and feel.

In one sentence: Square drills look sharper and more photo-like. Round drills feel faster, easier, and sparklier.

Square Drills Round Drills
Finished look Crisp mosaic, edge-to-edge, no gaps Soft glow, tiny gaps catch light
Detail Excellent for eyes, fur, text, straight lines Good, but fine lines look slightly rounded
Speed Slower — placement must be precise 20–30% faster, very forgiving
Difficulty Intermediate — crooked drills show Beginner-friendly — gaps hide mistakes
Sound & feel Satisfying “click” when aligned Smooth, meditative rhythm
Best for Portraits, pets, architecture, realism Florals, sunsets, abstract, first kits

Choose square drills if:

  • Your photo has 1+ faces you want to recognize instantly
  • It's a pet with layered fur, whiskers, or dark eyes
  • You love precision and don't mind using tweezers + a straightener
  • You plan to frame without glass and view up close

Choose round drills if:

  • This is your first or second kit
  • Your image is flowers, landscape, mandala, or abstract
  • You craft to relax, not to perfect every row
  • You have hand stiffness — round drills need less pressure

Still confused by labels like full-drill, partial, 3D vs 5D? We break it all down here: Round vs. Square Drills: What's the Difference?

Macro close-up comparison of square drills vs round drills on diamond painting canvas
Left: square drills tile tightly for sharp detail. Right: round drills add sparkle and forgiveness.

6. Best Size + Drill Combos for Your Photo (Cheat Sheet)

Bookmark this table when you order:

Photo Scenario Order This Size Pick These Drills Pro Note
Solo headshot, good lighting 50×70 cm Square Only drop to 40×50 if face fills 60%+ of frame
Couple, wedding, engagement 50×70 – 60×80 cm Square for realism, Round for dreamy glow Match canvas ratio to photo to avoid cropping faces
Family of 3–5, kids 60×80 – 70×90 cm Square Check smallest background face is still 6cm+
Dog / cat close-up 50×70 cm Square Side daylight shows fur layers best
House, street, landmark 50×70 – 60×80 cm Square Avoid wide panoramas — crop tighter
Flowers / abstract / sunset 40×50 – 50×70 cm Round Let sparkle do the work, detail matters less

Aspect ratio tip: If your photo is square (Instagram), order a square canvas (40×40, 50×50). If it's 4:3 phone photo, 40×50 or 60×80 fits best. Don't force a wide group photo onto a tall portrait canvas — you'll lose people on the edges.

7. Five Photo Tips That Matter More Than Megapixels

A great 40×50cm from a clear photo beats a blurry 60×80cm from a dark one. Before you upload:

  1. Light faces, not backgrounds. Faces in shadow turn to brown blocks. Bright, even daylight on faces = clean color mapping.
  2. Get closer, crop tighter. Fill 60–70% of the frame with your subject. Distant beach figures become unpaintable dots.
  3. Simplify the background. Busy trees, railings, and crowds steal drills from faces. Blur or crop them out.
  4. Skip heavy filters. High contrast, B&W filters, and beauty smoothing confuse the color chart. Send the natural original.
  5. One sharp focus. If eyes aren't tack-sharp in the original at 100% zoom, they won't be sharp in drills. Pick another shot.

For step-by-step examples, see our photo guide: Customized Diamond Paintings and How To Choose The Absolute Perfect Photo

8. What Makes a Quality Custom Kit? (What to Check Before You Buy)

Size and drills only shine if the base materials are good. Wherever you order, look for:

  • Thick, flat canvas (not thin plastic): Should lie flat after unrolling, with clear symbols you can read without squinting. Flocked or velvet-back canvases resist wrinkles.
  • Poured glue, not double-sided tape: Poured glue stays even and re-stickable for months. Tape lines dry out and trap air bubbles.
  • Consistent resin drills, sorted by DMC code: 13–20 facets is standard for 5D sparkle. Bags should include 10–15% extra and match the legend exactly.
  • Human-checked preview: Best sellers send a digital proof showing how your photo translates to drills. Auto-only conversion often turns skin green-gray. Always approve the preview.
  • Full kit in the box: Canvas, drills, applicator pen + extra tips, wax, grooved tray, and resealable bags. For your first kit, check our unboxing checklist: What To Do When Your First Kit Arrives

Cheap kits cut corners on glue and drill sorting — that's why drills pop off or colors look muddy, even at large sizes.

9. Your 60-Second Decision Checklist

Answer these three questions in order:

1. How many faces?
1 face → 40×50 minimum / 50×70 ideal
2 faces → 50×70 minimum / 60×80 ideal
3+ faces → 60×80 minimum / 70×90+ ideal

2. Sharp or sparkly?
Want people to say "Wow, that's exactly her!" → Square
Want relaxing shine and faster finish → Round

3. How much time do I have?
A few evenings → 30×40 to 40×50, round
A few weeks → 50×70, either drill type
A long-term wall piece → 60×80+, square

Still stuck? Go bigger + square for people/pets, smaller + round for decor/fun. You won't regret it.

10. Frequently Asked Questions

Is bigger always better for custom diamond painting?

Bigger preserves more detail, but only up to a point. Once faces are 8–10cm tall, going larger mainly adds hours, not likeness. For florals or abstract art, 40×50cm often looks just as good as 60×80cm and finishes twice as fast.

Do square drills really look sharper than round?

Yes. Square drills tile edge-to-edge with no gaps, so eyes, fur edges, and straight lines look crisper up close. The trade-off: crooked placement shows more. Use a light pad, work in small checkerboard sections, and straighten each row with a ruler edge.

Will round drills leave gaps?

Tiny gaps between round drills are normal — that's what creates their extra twinkle under lamps. From normal viewing distance (1m+), you won't see canvas through them on a good poured-glue canvas. If you see a lot of white, the canvas print or drill size is off, not the drill shape.

Can I do a family of four in 40×50cm?

Technically yes, but faces will likely be 3–4cm tall and lose likeness — especially kids in the back row. For 3+ people, start at 60×80cm. If budget or space is tight, crop to just faces/shoulders instead of full bodies.

How do I estimate working time?

Count ~1,000 drills per 25–30 minutes with a single placer, or 12–18 minutes with a multi-placer. A 50×70cm canvas (~44,000 drills) = roughly 18–22 hours total. Divide by how many hours you craft per week for a realistic finish date.

What size diamond painting fits a standard frame?

30×40cm, 40×50cm, 50×70cm, and 60×80cm match ready-made IKEA and craft-store frames in most countries. Custom sizes like 45×65cm may need custom framing. Pro tip: frame without glass so the facets keep sparkling, and seal first if it will hang in sunlight.

Final Thoughts: Size Up, Stress Down

If you remember one thing from this guide: when in doubt for people and pets, go one size larger and choose square drills. The extra drills cost a little more and take longer, but they're the difference between "cute craft" and "I can't believe that's diamonds!"

Ready to start? Pick your sharpest, brightest photo, match the canvas ratio, approve your preview render, and enjoy every sparkly hour.

Happy painting — and don't forget to share your finish! ✨


Found this helpful? Explore more: How-to Guides | Diamond Painting Problems & Fixes | Where to Buy Kits

You Have Diamond Painting Problems…We Have Answers & Solutions!

Every diamond painter runs into problems. Most are minor and fixable in minutes; a few are serious enough to threaten the project. Almost none of them are your fault — the medium has predictable failure points, and knowing them in advance turns a bad afternoon into a five-minute fix.

This is a straightforward troubleshooting guide, organised by the problem you are actually having.

Drills will not stick to the canvas

Usually caused by: dried adhesive, dust on the surface, peeling the protective film too early, or handling the canvas with oily fingers.

Fix it:

  1. Peel the protective film only over the area you are actively working on. This is the most common cause and the easiest habit to fix.
  2. Lift dust and lint with Blu-Tack pressed gently onto the surface, or a lint roller.
  3. Where adhesive has genuinely dried, apply a thin layer of craft glue or mod podge with a small brush and let it go tacky before placing drills.
  4. Store the canvas flat and cool. Heat softens adhesive until it stops gripping.

If adhesion is poor across the whole canvas on a new kit, that is a manufacturing fault. Contact the seller with photographs.

Drills lift off after you finish

Usually caused by: incomplete bonding, rolling or bending the piece too soon, or heat exposure.

Fix it:

  • Press the whole surface firmly with a roller or the flat of your hand, then leave it flat for a day or two.
  • Re-seat any lifted drills with a tiny dot of craft glue, pressed and left to dry.
  • Seal the surface if the piece will be unframed or handled.
  • Never store a finished canvas rolled tightly.

See How Can You Preserve a Diamond Painting? for sealing done properly.

Drills are clumping together

Usually caused by: static, manufacturing residue, or contamination.

Fix it:

  • Wash drills in a sieve with lukewarm water and a drop of washing-up liquid, then dry thoroughly. This removes mould release and is the most effective fix.
  • Rub them with a fabric softener sheet or keep one in the container.
  • Shake the tray to spread drills rather than stirring with your pen.
  • Avoid very dry, heated rooms where static is worst.

The pen will not pick up drills

Usually caused by: depleted or hardened wax, or a dirty tip.

Fix it:

  • Press the tip firmly into fresh wax and twist. Use less than you think.
  • Wipe the tip clean on scrap paper.
  • Replace the wax entirely if it has gone crumbly — it is a consumable.
  • Keep a second pen loaded so you can swap instead of stopping.
  • Use fine tweezers for isolated or awkward placements.

I placed drills in the wrong squares

Usually caused by: poor lighting, faint symbols, or losing your place.

Fix it:

  • Lift the drills with fine tweezers. The adhesive is forgiving — misplaced drills come off cleanly if you catch them reasonably soon.
  • Improve your lighting. A daylight lamp is the cheapest meaningful upgrade in the hobby.
  • Magnify if the symbols are hard to read.
  • Lightly grid the canvas with a washable pen so drift is obvious.
  • Work in small, complete sections rather than jumping around.

I used the wrong colour over a whole area

Fix it: this is recoverable, but do not leave it.

  1. Work out how much is affected before starting.
  2. Lift drills with tweezers, working from the edge of the error inward.
  3. If adhesive has been disturbed, apply a thin layer of craft glue and let it go tacky.
  4. Re-place with the correct colour.

It is tedious but straightforward. The mistake is always smaller than it feels in the moment.

A colour bag is missing or short

Fix it:

  • Count all bags against the legend when the kit arrives, not mid-project. See What Should I Do When My Diamond Painting Kit Comes?
  • Photograph the contents and contact the seller. Most will send replacements.
  • If you cannot wait, substitute the closest colour from a stash and note it — the difference is often invisible at normal viewing distance.
  • Check whether the bag is genuinely short or simply mislabelled. Compare a drill against the legend swatch.

The canvas arrived creased or folded

Fix it:

  • Lay it flat, print side up, with heavy books along the creases for several hours or overnight.
  • Do not iron it. Heat damages the adhesive and distorts the print.
  • Gentle reverse rolling can speed it up, but patience works better.
  • A hard crease will remain faintly visible. Mounting the canvas to foam board helps flatten it and makes it far less noticeable.

Rolled canvases crease less than folded ones — worth considering on your next order.

The canvas will not stay flat while I work

Fix it: mount it. Tape or lightly glue the canvas to a foam board 2–3cm larger on each side. A rigid surface solves curling, makes placement easier, and lets you move and store the project safely.

Full instructions in How To Frame Your Diamond Painting Kit With Foam Boards!

Symbols are too small or faint to read

Fix it:

  • Better lighting first — this solves most of it.
  • A magnifying lamp or headset magnifier.
  • Photograph the legend and enlarge it on your phone or tablet as a reference.
  • On future kits, choose designs with bolder outlines and larger symbols.

The drills look different from the chart

Usually caused by: lighting, or a genuinely mislabelled bag.

Fix it:

  • Compare in daylight. Indoor lighting distorts colour significantly.
  • If the difference is real and large, photograph the drill against the legend swatch and contact the seller.
  • Small colour variation between batches is normal and usually invisible once placed.

The kit arrived damaged or wrong

Fix it:

  • Photograph everything, including the packaging, before opening further.
  • Contact the seller immediately with the photographs. Do not start the project — starting can void your claim.
  • If the seller does not respond, open a dispute through the marketplace's buyer protection.
  • For direct purchases, a chargeback is available as a last resort.

The project is taking far longer than expected

Usually caused by: unrealistic expectations rather than anything wrong.

Fix it:

  • Accept realistic timescales. A 40×50cm canvas is typically 20–40 hours. A 70×90cm is 60–100+ hours.
  • Break it into sections and treat each as a session, rather than tracking the whole project.
  • Photograph progress weekly. It makes the scale of what you have done visible.
  • Work one colour at a time on repetitive designs — it is often substantially faster.

Most abandoned projects are abandoned because the painter underestimated the time, not because of any technical failure.

I have lost motivation halfway through

Usually caused by: the middle of a large project, where the beginning excitement has worn off and the end is not yet visible.

Fix it:

  • Switch to a small, quick project and come back. A simple mandala or a small kit restores momentum.
  • Set a small, specific goal — "finish this ring," "complete this colour" — rather than "work on the project."
  • Paint alongside someone, in person or via a "paint with me" video.
  • Move the project somewhere visible. Out of sight genuinely means out of mind.

Quick reference

ProblemFirst thing to try
Drills won't stickPeel film only as you work; clean the surface
Drills lifting laterPress firmly, rest flat, then seal
Drills clumpingWash and dry them, add a dryer sheet
Pen won't pick upRefresh or replace the wax
Wrong squaresTweezers, better light, magnification
Wrong colour areaTweezers from the edge inward, then re-glue
Missing colourPhotograph, contact seller, don't start
Creased canvasWeigh it flat overnight, never iron
Won't stay flatMount it to foam board
Symbols unreadableBetter light, then magnification
Took too longNormal. Break it into sections
Lost motivationSmall project to restart momentum

Related reading: Diamond Drills Getting Stuck Together & Lifting Off Of The Canvas? goes deeper on adhesion, Diamond Painting Tips & Tricks & How to Bring Your Diamond Painting Kit Back to Life From A Mistake covers recovering from errors, and More Weird Diamond Painting Tricks & Tips That Work! has the habits that prevent most of this list.

More Weird Diamond Painting Tricks & Tips That Work!

Once you have finished a kit or two, the basics stop being interesting and the marginal gains come from small, slightly odd habits that experienced painters pick up over time.

This is a follow-up to Diamond Painting Tips & Tricks & How to Bring Your Diamond Painting Kit Back to Life From A Mistake. These are the less obvious ones — the tricks that make a project faster, cleaner, and less frustrating.

Tray and drill handling

Line the tray with something grippy

A bare plastic tray lets drills slide into a pile. A scrap of felt, a piece of non-slip shelf liner, or even a folded paper towel in the base gives drills something to sit against and keeps them spread in a single layer.

Shake, never stir

Stirring drills with your pen pushes them together and increases static clumping. A gentle shake of the tray spreads them into an even layer instantly.

Load the tray with only what you need

Pouring a whole bag into the tray is tempting and counterproductive. Too many drills means a deep pile, more static, and difficulty finding the flat face of any individual drill. Pour a shallow layer, top up as you go.

Use a funnel to get drills back into bags

Every kit should come with one and many do not. A small paper funnel — rolled from any scrap — makes returning leftover drills to their bags fast and spill-free.

Keep a "reject" pot

Misshapen, chipped, and wrong-colour drills turn up in every kit. Drop them in a small container as you find them rather than discarding them into your working tray, where you will pick them up again by accident.

Pen and placement

Two pens, not one

Keep one loaded with wax for normal work and a clean, unloaded one as a spare. When the first starts failing, swap immediately rather than stopping to re-wax. You will re-wax the spare during a natural pause.

Less wax than you think

A common beginner error is loading too much wax. It oozes, gums up the drill, and leaves residue on the canvas. A light touch on the wax is enough.

Tweezers for the awkward spots

Fine tweezers beat a pen for tight corners, single isolated drills, and correcting a mistake without disturbing neighbours. Keep a pair within reach.

Tap, do not press

Once a drill is positioned, a light tap seats it. Pressing hard pushes adhesive sideways and can make the drill less secure, not more.

Roll finished sections

A small rolling pin, a seam roller, or even a smooth bottle rolled gently over completed areas seats drills evenly and catches any that were only half-placed.

Canvas management

Mount it from day one

Tape or lightly glue the canvas to a foam board slightly larger than itself. A rigid surface makes placement easier, keeps the canvas flat, and lets you move and store the project safely. See How To Frame Your Diamond Painting Kit With Foam Boards!

Peel the film only as you go

The most important single habit in the hobby. Exposed adhesive collects dust and dries out. Keep the protective covering on everything you are not actively working on.

Work from a corner, not the middle

Starting in the middle means your hands rest on sticky exposed canvas constantly, transferring oils and dust. Anchor yourself at a corner and work outward.

Mark your place with a washable pen

Lightly gridding the canvas into numbered sections keeps you oriented on a large project and makes it immediately obvious when you have drifted a row.

Keep a cover handy

A sheet of the original protective film, or plain paper, laid over the project when you stop keeps dust, hair, and cats off the adhesive. Make it a reflex.

Colour and legend

Photograph the legend

Canvas legends fade, crease, and get covered in wax. Take a clear photo of the legend at the start and keep it on your phone. It is also invaluable if the canvas edge gets damaged.

Separate confusable colours physically

Some kits include two colours that look nearly identical in the drill but differ on the chart. Identify these early and store them far apart, clearly labelled. This prevents one of the most common and annoying errors.

Work one colour at a time on repetitive designs

On mandalas and other symmetric patterns, completing one colour across the whole canvas is often faster than section-by-section work, because you load the pen once and the pattern is predictable. See What Are Mandala Diamond Paintings & Why Are They So Popular?

Count drills before you commit to a colour

If a bag seems short, check it against the chart before placing half the section. Finding a shortage early means the seller can still help.

Workspace and comfort

Lighting is the cheapest upgrade

A daylight LED lamp reduces eye strain and colour mistakes dramatically, particularly in the evening. This is the single best value purchase in the hobby.

Magnify if you need to

A magnifying lamp or headset magnifier makes symbols far easier to read. There is no virtue in straining. See I Love Diamond Painting But My Eyes Aren't What They Used to Be.

Sit at the right height

A canvas flat on a low table means hunched shoulders and a sore neck. Bring the work up to a comfortable height — a board on your lap, a lap desk, or a table at elbow height.

Take regular breaks

Fine focus work tires the eyes faster than you notice. A short break every 30–45 minutes keeps accuracy up and prevents the headache that ends sessions early.

Keep water and snacks away

Spills on an exposed adhesive canvas are genuinely difficult to recover from. Put drinks behind you, not beside you.

Storage and leftovers

Label everything

Write the symbol and colour code on every container. You will not remember which near-identical pink is which in three weeks.

Store drills sorted, not by bag

Once you have painted a few kits, consolidating leftover drills into a compartment box by colour turns random scraps into a usable stash. See 5 Super Fun Things To Do With Your Leftover Diamond Painting Drills.

Keep the original bags until the project is done

They identify colours, hold spares, and are useful for storing leftovers afterwards.

Store finished pieces flat

Never lean a finished canvas on its edge and never roll one tightly. See How Can You Preserve a Diamond Painting?

Mindset

Do a test section first

Complete a small corner before committing to a working rhythm. It tells you about adhesion, symbol legibility, and roughly how long the project will take.

Accept that mistakes happen

Every painter misplaces drills. The fix is almost always trivial — lift it with tweezers and re-place. Do not let one error sour a session.

Photograph your progress

Weekly photos of the same section are genuinely motivating on a long project, and they make the scale of what you have done obvious in a way that staring at the canvas is not.

Stop while you are enjoying it

Ending a session on a good note makes you far more likely to return to the project than pushing through to the point of tedium.

The three that matter most

If you take nothing else from this list:

  • Mount the canvas to a board
  • Peel the protective film only as you work
  • Buy a good daylight lamp

Those three habits prevent most of the frustration in this hobby.


Related reading: Diamond Painting Problems and Solutions for when things go wrong, and Diamond Drills Getting Stuck Together & Lifting Off Of The Canvas? for adhesion trouble specifically.

The 6 BEST Places To Get Your Diamond Painting Kits From

Where you buy a diamond painting kit matters more than most beginners expect. The same nominal "30×40cm full drill kit" can be a joy or a week-long fight depending on where it came from — the difference shows up in print quality, adhesive strength, drill consistency, and how complete the colour legend actually is.

This guide is a rebuild of the original list. The specific shops named are examples of each type of source, and the hobby moves fast, so check current stock and reviews before ordering. The categories themselves have stayed stable.

1. Dedicated diamond painting brands

Best for: quality, design range, and reliable customer service.

Brands built entirely around this hobby — names like Diamond Art Club, Paint With Diamonds, and similar established makers — design their own canvases, control their printing, and stand behind the product.

The advantages are real:

  • Consistent drill quality with fewer misshapen or mis-coloured gems
  • Adhesive that holds reliably over a long project
  • Accurate, well-separated colour legends
  • Licensed artwork and original designs
  • Responsive support if a kit arrives short or damaged
  • Active communities of customers who share finished work

The trade-off is price. Expect to pay meaningfully more than marketplace equivalents. For a large canvas you will spend weeks on, that premium usually pays for itself.

If you are buying your first serious kit, start here. The extra cost buys you a project that does not fight you, which is the difference between finishing and abandoning.

2. Etsy sellers

Best for: custom photo canvases and small independent designers.

Etsy is the strongest source for two things: custom diamond paintings made from your own photograph, and original designs from individual artists you will not find anywhere else.

Practical guidance:

  • Read recent reviews specifically mentioning finished results, not just shipping speed
  • For custom work, choose sellers who send a digital proof before production
  • Check the stated canvas size carefully — some listings show the image area while the physical canvas is larger
  • Ask about colour count if you are ordering a photographic custom piece

Etsy is also the place to support small designers directly, which matters if you want the hobby to keep producing original artwork rather than recycled clip art.

3. Amazon and major marketplaces

Best for: speed, cheap starter kits, and buyer protection.

Marketplace kits are cheap, arrive fast, and come with straightforward returns. They are a reasonable way to test whether you enjoy the hobby at all before spending serious money.

Be aware of what you are buying:

  • Quality is inconsistent and largely a lottery between sellers
  • Product images are frequently borrowed from higher-quality brands
  • Canvas sizes are sometimes smaller than the listing implies
  • Adhesive quality varies enormously
  • Drill counts may be generous with spares, or short

The reliable strategy is to filter hard by review volume and recency, look specifically for customer photos of finished canvases, and buy small first. A cheap kit that teaches you whether you like the hobby is money well spent. A cheap 70×90cm kit you abandon halfway is not.

4. Craft and hobby stores

Best for: seeing a kit in person, and instant gratification.

Large craft chains and local hobby shops increasingly stock diamond painting kits alongside cross-stitch and paint-by-numbers. Selection is narrower and prices are higher than online, but there is a real advantage in handling the box — you can check canvas size, drill type, and print clarity before committing.

Worth visiting if you are buying a gift and want something reliable the same day, or if you want to compare a couple of kits side by side before ordering a big one online.

5. Direct-from-manufacturer and bulk sellers

Best for: volume, and experienced painters who know what they want.

Some manufacturers sell direct, and there are wholesale-style sellers offering kits in bulk at low unit prices. This route rewards experience: you need to already know how to judge print quality and adhesive from photos and reviews, because there is little hand-holding.

Useful for stocking a backlog of projects, or for painting groups and clubs buying together. Less suitable for a first purchase, where a bad experience is disproportionately discouraging.

6. Community swaps, sales, and secondhand

Best for: leftover drills, unfinished projects, and cheap experimentation.

The diamond painting community trades actively. Facebook groups, subreddits, and dedicated forums all have buy/sell/trade activity covering:

  • Finished canvases
  • Part-completed projects, which can be a bargain
  • Surplus and leftover drills, sorted by colour
  • Unwanted kits from people whose tastes changed

This is the cheapest way to build a drill stash and the most sustainable way to keep kits out of landfill. It is also where you find out what other painters actually think of a brand, unfiltered by marketing.

The obvious caution: buy from people with visible history, use protected payment methods, and expect no warranty on anything.

How to choose between them

SituationGo here
First ever kit, testing the hobbyMarketplace, small and cheap
First serious kitDedicated brand
Custom photo giftEtsy, with a proof
Large canvas you will spend months onDedicated brand, always
Buying a same-day giftLocal craft store
Building a drill stash cheaplyCommunity swaps
Bulk buying for a groupDirect or wholesale

Red flags on a listing

Learn these and you will avoid most bad purchases:

  • Product photos that look too good. Glossy mockups with perfect lighting are renders, not photographs of the actual kit. Look for customer photos instead.
  • A price far below everything comparable. Canvas printing, adhesive, and drills cost money. A 50×70cm full drill kit at a fraction of the going rate is cutting corners somewhere.
  • No canvas dimensions, only "30×40." Units missing, or image area stated where canvas size is implied, are common ways to make a kit look bigger than it is.
  • Stock photos borrowed from a known brand. Reverse-image search is quick and often revealing.
  • No recent reviews, or reviews only about shipping. You want feedback on the canvas, not the courier.
  • Vague colour counts. "Many colours" tells you nothing. A specific number lets you judge whether the design has enough range.
  • Custom orders with no proof step. If a seller will not show you the drill grid before production, you are gambling on the conversion.
  • No returns policy on a marketplace listing. Legitimate sellers accept that kits occasionally arrive damaged.

When to buy

Diamond painting has predictable sales rhythms worth timing around:

  • Black Friday and Cyber Monday — the biggest discounts of the year from dedicated brands
  • January — post-holiday clearance, though note the shipping disruption covered in Happy Chinese New Year!
  • End of season — retailers clearing Christmas and Halloween stock
  • Brand anniversaries and launch events — dedicated brands often run promotions around these
  • Craft store coupon cycles — large chains run regular percentage-off coupons that stack well on kits

If you are building a backlog, buying two or three kits during a genuine sale is the single best value move in the hobby.

A sensible first-purchase plan

If you are new, this sequence avoids the two most common mistakes — overspending on a first kit, and underspending on a large one you will abandon:

  1. Buy one small, cheap marketplace kit around 20×30cm with a simple design. Treat it purely as a test of whether you enjoy the activity.
  2. If you enjoy it, buy one mid-range kit around 30×40cm from a reputable brand. This is where you find out what good canvas quality feels like.
  3. Only then buy large. By now you know your preferences on round versus square, full versus partial, and how long projects actually take you.
  4. Buy custom last. Custom photo canvases are the least forgiving category and deserve an experienced eye on photo selection.

Skipping to step three is the most common way to end up with an unfinished 70×90cm canvas in a cupboard.

What to check on any listing

Regardless of where you buy, confirm these before ordering:

  • Actual canvas dimensions, and whether the stated size is canvas or printable image area
  • Full drill or partial drill
  • Round or square drills
  • Number of colours in the design
  • Whether tools are included — pen, wax, tray, and usually a basic frame-free setup
  • Recent customer photos of finished work, not the mockup
  • Returns policy, particularly on custom orders which are usually non-refundable

Related reading: What To Look For When Purchasing a Diamond Painting Kit? goes through evaluating a kit in detail, and What Should I Do When My Diamond Painting Kit Comes? covers the first hour after it arrives.